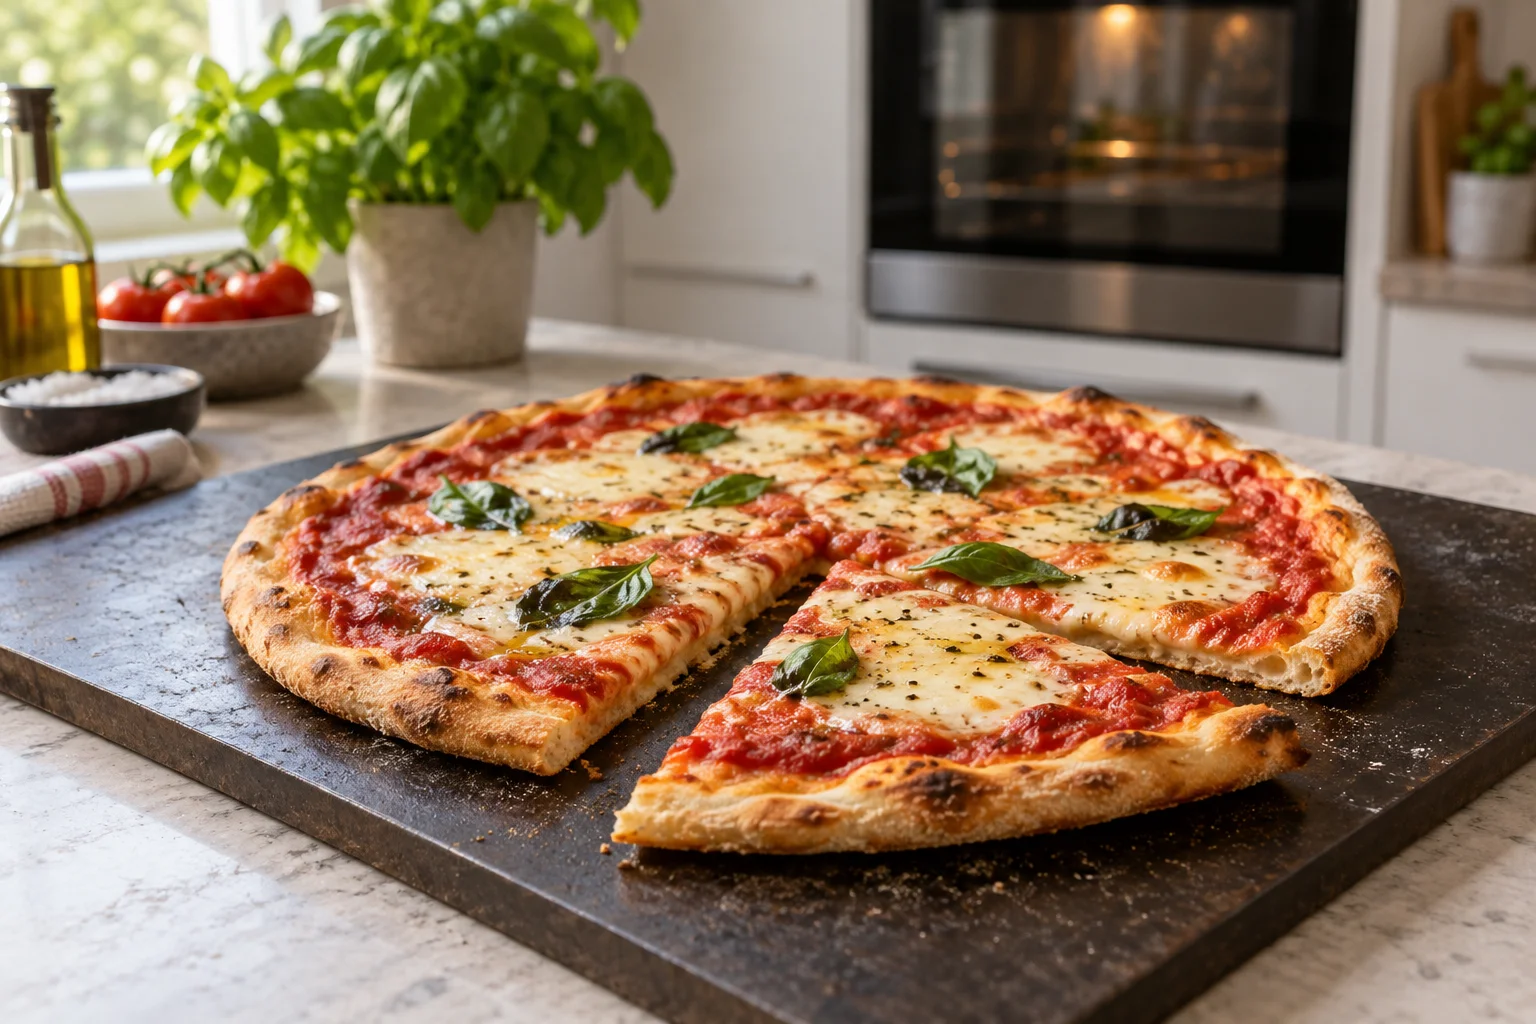
A complete starting routine for two round pizzas
Good homemade pizza depends on coordinating the dough, the baking surface and the topping. The base needs enough heat to cook through while the cheese melts and the rim colours. This guide helps you build a workable routine around the oven you already own, then adjust it when the underside stays pale, the cheese becomes too dark or several pizzas need to follow one another.
For a first session, use our margherita recipe. Its 300 g flour, 195 g water, 7.5 g salt and 1.5 g instant dry yeast make two dough balls of approximately 252 g each by calculation. Each pizza receives 80 g crushed tomatoes and about 62 g well-drained mozzarella. Open each portion to roughly 28 to 30 cm if your baking surface has sufficient room. Keep the centre evenly thin and leave a more pronounced rim if that is the style you want.
Before switching on, place a suitable stone or steel on a rack in the upper third, leaving clearance from the heating element and enough space to load the pizza safely. Start at 250°C conventional top and bottom heat and allow around an hour for the surface to preheat. This is a specific starting setup; follow any different requirement supplied with your accessory. Allow approximately eight to twelve minutes for the first pizza and check the rim and underside from minute eight. It is ready when the middle is cooked through, the base is browned and the cheese has melted. Check earlier if the topping is darkening quickly.
For a first pizza around 7 pm, start heating the oven and baking surface around 6 pm and prepare the sauce and cheese during that time. Just before 7 pm, open and top the ready dough, load it and begin checking at approximately 7:08 pm. Bake the second pizza when the surface has recovered sufficient heat. Prepare ingredients for both, but top only the pizza that is about to enter the oven.
If you bake directly on an ordinary tray
Pizza placed on a cold tray begins with less immediate heat beneath it. For that method, start on a shelf below the middle and watch the underside. For a thicker shared pizza, use our tray recipe: 500 g flour, 350 g water, 12 g salt, 3 g instant dry yeast and 20 g oil make approximately 885 g dough for a metal tray around 30 by 40 cm. Add 300 g tomatoes and 200 g drained mozzarella. This produces a different dough thickness from the individual round pizzas.
Bake the tray pizza in a preheated oven at 240°C conventional heat for approximately twelve minutes with the tomato topping. Then add the cheese and allow another eight to twelve minutes. Check the underside towards the end as well. The resting stages are set out in the tray recipe. This method explains why its total baking time should not be applied to a thin pizza on hot steel: the tray, thicker dough and later cheese addition change the sequence together.
Decide which pizza you want to make
A thin round pizza and a thick tray pizza ask different things of your kitchen. A round pizza cooks on a baking surface or tray and is usually baked individually. You can serve each one for sharing as it comes out. Tray pizza stays supported by its pan, making a softer dough and a larger shared portion easier to manage. For four people who want to eat together, one tray may be more convenient than four separate rounds.
Start with a recipe written for a domestic oven. Do not transfer a short cooking time from a very hot pizza oven without changing the rest of the approach. A longer bake affects how much moisture the dough and topping lose. Our margherita recipe is a starting point for individual pizzas, while the tray pizza provides a shared option. Choose one format first. Keeping it consistent makes the effect of an oven adjustment easier to understand.
Understand what a tray, stone or steel changes
A metal baking tray is already available in many kitchens. Shaping the dough on it and putting the whole tray into the oven is straightforward. The underside starts differently from dough placed directly onto an already hot surface, however. A suitable inverted tray can also provide a preheated surface. Check that its coating, shape and manufacturer instructions allow that use, and that you can transfer the pizza onto it without an awkward movement.
A stone or steel heats inside the oven before the pizza goes in. Both store heat and release it into the base on contact. Steel transfers heat faster than a typical ceramic baking stone, but thickness, position and temperature still affect the result. This does not produce a universal cooking time. Our stone and steel comparison explains the buying decision in more detail. For a first evening, a suitable surface you can handle confidently is enough.
Preheating includes the baking surface
The oven's ready signal usually indicates that the air around its temperature sensor has reached the setting. A heavy baking surface may still be absorbing heat. Follow the preheating guidance supplied with your stone or steel, together with the recipe. Put the surface on an appropriate shelf before switching the oven on. Moving a heavy, hot slab later creates work and risk without improving your pizza.
Treat preheating as a scheduled part of preparation. While the oven heats, drain the cheese, prepare the sauce, leave the dough covered as directed and clear a landing space for the cooked pizza. Load the first pizza when both oven and surface are ready. This helps avoid a familiar pattern in which the first base is soft and pale but later pizzas improve despite apparently identical settings. The surface has simply had longer to heat.
Choose a temperature and heating mode deliberately
Use the mode specified by your recipe as the first setting. Conventional top and bottom heat provides a useful starting point for a single pizza because shelf position changes its relationship with the heating elements. Fan cooking can also work, but it affects the exposed topping differently. A dedicated pizza setting may combine heaters in a particular way. Check what that setting does on your model instead of assuming that every pizza programme works alike.
Stay within the approved temperatures of the oven, baking surface and accessories. A high oven setting does not override the limit on a coated pan or a sheet of baking parchment. If a suitable recipe specifies 250°C, start there and assess the result. Change one variable at a time on subsequent pizzas. Moving the shelf and switching cooking modes together makes it harder to understand which change helped and which may have made things worse.
Adjust the shelf using the result
The useful shelf position is the one where the top and base finish together. Begin with the position recommended in the recipe or accessory instructions. If the topping darkens while the underside remains pale, check preheating, topping quantity and the baking surface before moving anything. Plan a lower position for the next baking session rather than moving a heavy hot stone or steel during the bake. If the base is already dark but the cheese has barely melted, you can use a peel to move the pizza off the hot surface onto a suitable rack above it and finish briefly under upper heat. Leave the heavy stone or steel in place.
A brief spell under the grill, or broiler, can add colour if your oven and accessories allow the combination. Stay beside the oven and watch closely because the surface can change quickly. Keep parchment away from open flames and exposed glowing elements. A shelf distance mentioned in another kitchen is not a universal instruction. Your appliance, the space needed for the pizza and a safe loading and unloading route determine what is appropriate.
Open the dough evenly through the middle
An evenly thin centre is easier to cook through than a base with thick islands beneath the topping. Press from the middle towards the outside and rotate the dough as you work. If you want a raised rim, handle that edge less firmly. The pizza does not have to be a perfect circle. A slightly smaller, even shape often fits the baking surface better and is easier to move than an oversized base stretched to its limit.
If the dough springs back immediately, cover it and allow a short rest before continuing. Pulling harder can create weak spots and tears. Cold dough also needs the preparation time specified by its recipe before shaping. Use enough flour on the work surface to prevent sticking, then remove loose excess before baking. You want a movable pizza, not a thick flour layer underneath it. For repeated problems, use our guide to sticky, tearing or shrinking dough.
Prepare toppings with their moisture in mind
A thick layer of sauce, wet mozzarella and several juicy vegetables can together introduce more moisture than the bake removes. Spread sauce thinly at first. Drain fresh mozzarella and cut it into suitable pieces. With very juicy tomatoes or cooked vegetables, pay attention to the liquid actually reaching the pizza, not only the ingredient's weight. A modest-looking topping can still be wet if it carries a pool of juice. Excess oil is a separate issue that can make the topping greasy.
Prepare ingredients separately when they need substantially longer to cook than the pizza. Thick raw potato slices or large pieces of firm vegetables will not reliably finish during a short bake. Use suitable thin pieces or cooked, cooled ingredients. Raw meat should not become an uncertain extra task within a quick pizza routine. Two uncomplicated topping combinations are easier to manage than a large selection whose cooking needs and moisture levels differ considerably.
Plan the transfer before adding toppings
Decide how the pizza will enter the oven before you start building it. A tray is straightforward because the pizza remains on it. A hot stone or steel requires a suitable peel or another safe transfer method. Keep the preparation surface clean, dry and cool. Sauce beneath the dough and a peel that is already hot make sticking more likely. Separate the preparation area from the place where you put hot tools after removing a pizza.
Before opening the oven door, make a small movement to check that the pizza slides on the peel. If one spot sticks, lift and release it on the worktop, adding a little dusting flour where needed. Do not try to rescue a firmly stuck, fully topped pizza with a violent movement over the hot oven. Parchment is only an option within its stated temperature limits and accessory instructions. High heat or grill use may require another method.
Judge the base as well as the rim
A recipe time tells you when to check; it does not replace checking. Towards the end of the suggested bake, look at the rim and carefully inspect the underside using a suitable tool. The base should be cooked through and coloured to your preference. One dark bubble on the edge tells you little about the centre. If browning is uneven, careful rotation may help, provided there is enough room to do it safely.
If the cheese finishes before the base, changing cheese is not necessarily the first answer. For a longer bake, adding some of it later may suit the recipe better. Also review quantity and distance from the upper heat. After baking, a short rest on a suitable rack lets steam escape from beneath the base. Transfer the pizza to a board for cutting and serve promptly. Leaving it flat on a cold surface can soften a previously crisp underside.
Organise consecutive pizzas around oven capacity
Work backwards from the slowest stage. Suppose one pizza takes ten minutes in your oven and you allow two minutes for each changeover. Four pizzas then represent roughly 48 minutes of work. This is a planning calculation, not a performance promise for your equipment. Extra recovery time for the baking surface can extend the sequence. Serving pizzas for everyone to share often makes that pattern more enjoyable than asking each person to wait for a separate meal.
Shape and top the next pizza when its baking slot is close. A long wait on a peel increases the chance of sticking. Keep perishable ingredients chilled and bring out smaller amounts as needed. If later bases become paler, allow the surface time to recover heat before the next load. Reserve a clear place for hot trays and tools throughout the session. A tidy third changeover matters just as much as a well-organised first one.
Turn the result into one useful adjustment
Keep only the notes that will help next time: recipe, dough-ball weight, baking surface, preheating time, shelf, oven mode and approximate cooking time. Add one concrete observation such as "base good, cheese too dark". That points to a useful adjustment. Simply deciding to use more heat is unhelpful when the underside is already finished. Keep the dough and topping combination broadly the same while comparing settings so that you are changing a known part of the process.
For your next session, continue with our margherita or tray pizza recipe. The dough calculator scales the ingredients to the portions you have chosen. If you later consider different equipment, the stone and steel guide helps narrow the choice. Your first aim is a routine that works repeatedly in your kitchen: a properly heated surface, dough you can handle, a topping suited to the bake and a safe route between the worktop and the oven.