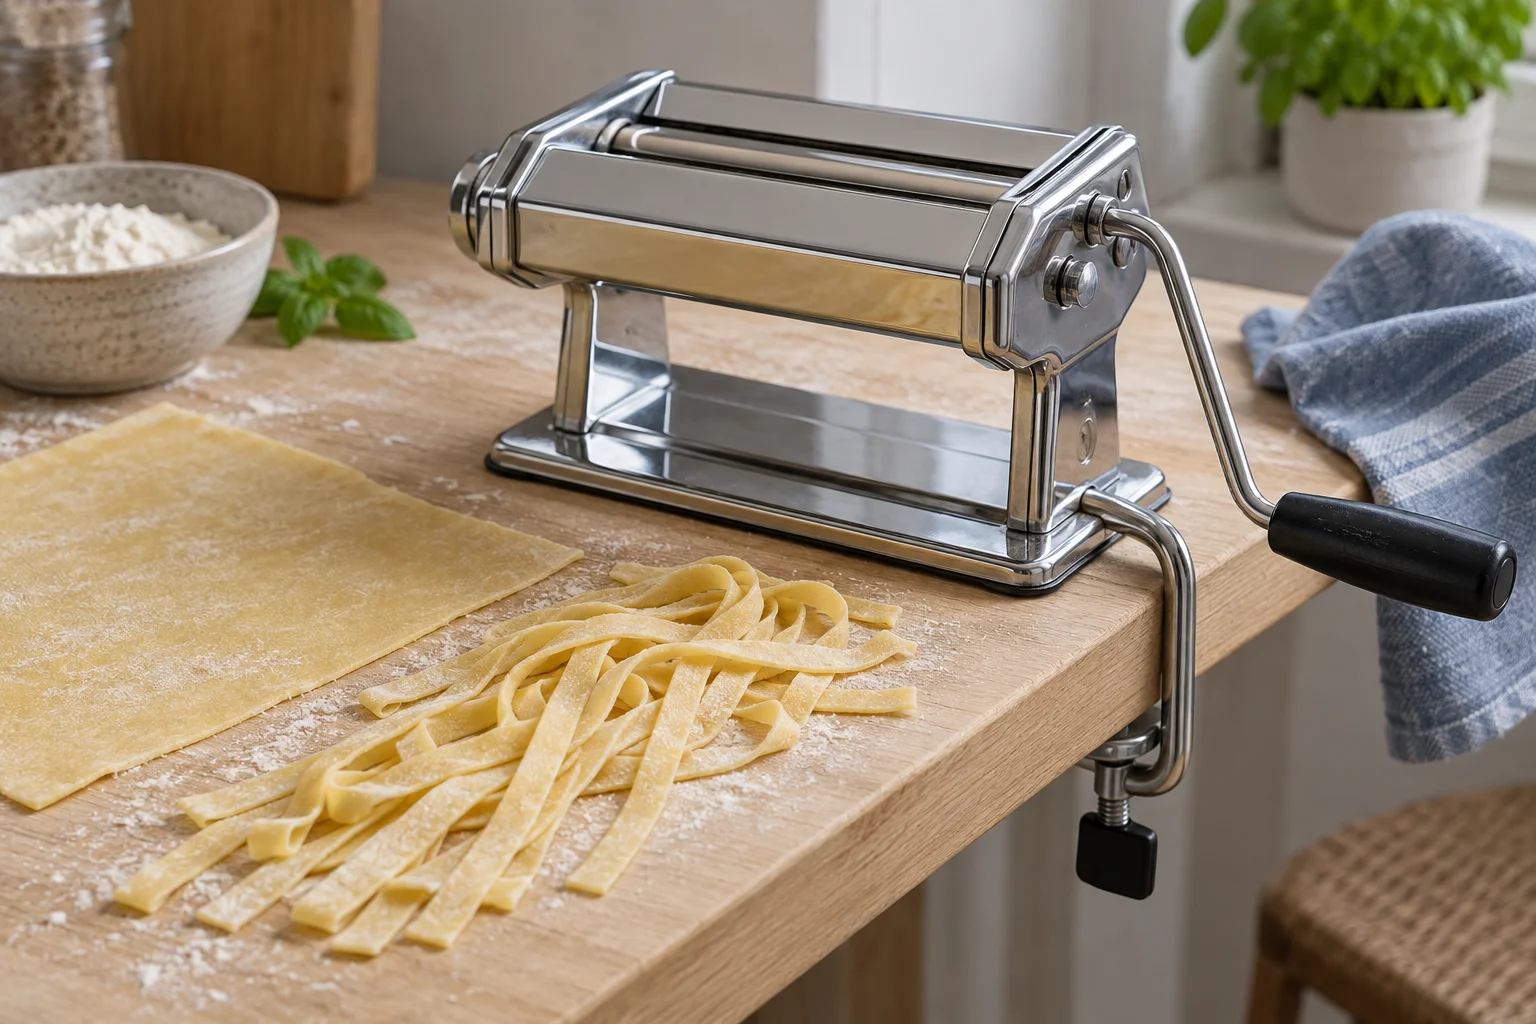
What the rollers do, and what must be ready first
A traditional roller pasta machine turns prepared dough into an even sheet. A matching cutter then divides the sheet into particular widths. The rollers do not automatically mix your ingredients or turn dry crumbs into suitable dough through an unlimited number of passes. They work best with a cohesive mixture that has already been kneaded and rested. Check that foundation first: you should be able to flatten the piece without it breaking apart widely or leaving a sticky film across your hand. The first wide passes can still smooth out smaller irregularities.
The method below is for machines that roll fresh pasta sheets, particularly manual tabletop models. An extruder that pushes dough through a die works differently and needs its own formula and instructions. A roller attachment for a stand mixer also has different fixings and operating rules from a hand-cranked machine. Use only doughs and accessories suitable for your model. The shared steps explain the process, while the permitted load, operating speed and mounting method come from your specific instructions. This distinction helps you see which decisions concern the dough and which concern the equipment.
Secure the machine and clear working space
Place a manual machine on a stable work surface and secure it with its intended clamp. The clamp must fit the table edge and hold firmly without damaging the surface. Before feeding any dough, check that you can turn the handle through a full rotation: a nearby drawer, chair or your own position might restrict its movement. Allow space on both sides of the machine for laying out sheets. Have a clear board or tray ready for the cut pasta too. Otherwise you may find yourself holding a long, soft strip in the air while searching for somewhere to put it.
For a new appliance, check the instructions for first use. Some manufacturers specify a preliminary cleaning step followed by passing through a small piece of dough that must then be discarded. The current Marcato Atlas instructions describe such preparation; the cleaning dough is not intended to be eaten. With electric equipment, disconnect the power as instructed before fitting or removing accessories. Keep hair, jewellery and loose clothing away from moving parts. Fingers and tools do not belong in the roller gap, even on a hand-cranked machine. If something jams, stop turning the handle before investigating.
Divide the dough and keep it covered
A compact portion is easier to handle than a heavy slab containing the whole recipe. For example, divide a rested dough weighing about 465 grams into four pieces of roughly 116 grams each. Small rounding differences do not matter for rolling. What matters is that each piece is manageable enough to feed and catch without pulling. Cover the other three pieces immediately. This prevents a dry skin that might later appear as a stiff flake or cracked edge in the sheet. Uncover the next portion only when the previous one is finished or has been put aside under a suitable cover.
Flatten the first piece with your fingers or a rolling pin into a short slab. It can be slightly narrower than the rollers; there is no need to fill their entire width. A tall, rounded lump is more likely to be squeezed awkwardly at the entrance than drawn through steadily. If chilled dough is too stiff to flatten, let the covered portion become more pliable first. Do not try to make the machine substitute for that step by forcing the dough down. A fine egg pasta dough is a useful starting point, although a suitable dough made from finely milled flour and water can also be rolled.
Begin with the widest roller gap
First select the widest opening between the rollers. The actual gap matters, rather than any supposedly universal setting number. On the current Marcato Atlas, the widest setting is marked 0; other machines may arrange their scales differently. Present the flattened slab straight to the entrance and turn the handle steadily in the instructed direction. Support the emerging sheet without pulling it. The rollers provide the forward movement. A second person can help with long sheets, but a suitably small portion is normally quite manageable on your own.
During the first wide passes, you can fold the sheet and feed it through again to make its shape and structure more regular. Gently press out any large trapped air pockets and keep the folded slab narrow enough for the entrance. A little flour helps if the surface sticks, but a thick layer between the folds makes it harder for them to join. Repeat only until you have a cohesive, regular sheet. Folding is not something you need to continue throughout the entire rolling process. Once the foundation is even, move on to progressively reducing the thickness.
Narrow the gap one stage at a time
Move to the next narrower setting and pass the sheet through again. Continue on the same principle. Large jumps from a wide gap to a very narrow one put unnecessary strain on the dough and may cause tears or folds. The sheet grows longer with each pass. Support it loosely on your hand or the clear work surface and prevent a hanging end from stretching under its own weight. Cut an overly long strip across into manageable sections. This does not reduce the quality of the dough; several shorter sheets are often easier to cut evenly than one very long sheet.
The final setting depends on the machine and pasta shape. As a specific example, the current Atlas instructions recommend setting 6, producing a sheet around one millimetre thick, for the cutter that makes 6.5-millimetre-wide fettuccine. That is a model-specific specification, not advice for every machine, filled pasta shape or cutter. Setting numbers from different manufacturers are not interchangeable, and a narrower cut may require a different sheet thickness. Follow the pairing of attachment and thickness in your own instructions. The thinnest sheet a machine can technically produce is not automatically the most suitable for your dish.
Control dusting flour and recognise tension
Dust a sticky surface sparingly and spread the flour evenly. It should prevent sticking without leaving a visibly thick layer on the sheet at every pass. Excess dusting changes the surface and can leave an unwanted floury coating during cooking. If the dough repeatedly sticks to the rollers, first check its consistency and the condition of the machine. A distinctly over-wet mixture will not be fixed simply by adding more layers to the outside. If necessary, correct the dough as a cohesive piece, let it rest covered again and restart at the wide setting.
If the sheet springs back strongly, it does not automatically need more flour. Cover it for a few minutes and try again after that pause. Cracked edges, on the other hand, can result from dryness, an exposed surface that has formed a skin, or an overly large change in roller setting. Compare the edge with the centre. If only the outside has a firm skin, part of the dough probably spent too long uncovered. If the whole piece is crumbly, its moisture balance may be unsuitable. Making that distinction avoids unnecessarily altering an elastic, properly mixed dough with extra dry ingredients.
Check the surface before cutting
A freshly rolled sheet may still be too moist for the cutter. The resulting strands can then cling together or fail to separate cleanly. If needed, leave the sheet briefly on a lightly floured surface and check it repeatedly. It should become less sticky on the outside while remaining flexible. A fixed waiting time would be misleading: temperature, humidity, sheet thickness and flour all affect how quickly the surface dries. If it becomes brittle or breaks when bent, the pause has been too long. Cut a small trial sheet before leaving all your rolled pieces exposed.
Dust both sides sparingly and feed the sheet straight into the appropriate cutter. On a manual machine, this may mean moving the crank into the cutter attachment's socket. Follow the mounting and operating instructions. Catch the ribbons loosely and put them down without compressing them. If several strands remain joined, do not pull hard on the whole bundle. Stop turning the crank. Switch off any motor and disconnect it from the power supply as instructed before inspecting a fault. Only then check whether the sheet was too moist, its thickness suits the attachment, or dried dough is interfering with the mechanism.
Organise the cut pasta around the meal
Spread the cut noodles loosely on a lightly floured surface or arrange them in small, loose portions. Tightly compressed nests can stick together inside, especially while the pasta is still moist. For a first attempt, a clearly arranged layer with some space between the strands is often easier to assess than a large decorative nest. Have the sauce ready before the pasta goes into the water as well. Fresh, thin ribbons cook quickly, leaving little time to start chopping onions or prepare a cold frying pan. The machine reduces the work of rolling, but does not replace this brief kitchen planning.
Cooking time and roller setting are connected: a thicker sheet generally needs longer than a very thin strip made from the same dough. Check a piece at its thickest point rather than simply waiting for it to float. If the noodles will finish in a hot sauce, include that stage in your judgement. For later use, suitable shaped portions can first be frozen separately on a tray and then packed. Brief surface drying before cutting is not a method for making pasta safe to store in a cupboard. Its purpose is only to make the surface easier to handle during the current preparation.
Clean according to the manufacturer's instructions
Stop the machine before cleaning and disconnect electrical components as instructed. Remove loose flour and dough using the specified tools. For many traditional roller machines, these include a cloth and a suitable brush. Do not simply immerse the entire machine in washing-up water or put it in a dishwasher without explicit manufacturer approval. Moisture trapped in inaccessible areas can cause problems. Sharp objects are also a poor improvised way to scrape between the rollers. Dismantle the equipment only as far as the cleaning instructions describe.
Read the details rather than applying one blanket rule to every component. The current Atlas instructions, for example, distinguish the machine that must not be washed in water from certain removable combs and scrapers with their own cleaning directions. After an allowed wet-cleaning procedure, those parts must be completely dry before they are refitted. A motor or another attachment may have different requirements again. Store the machine dry and protected from dust. Starting the next session with clean rollers, secure mounting and small covered dough portions makes it easier to control the sheets deliberately.
Correct small problems at the right stage
If a sheet emerges crooked, first check whether you are feeding it at an angle or pulling on one side. An even crank movement and support without tension are often enough to correct that. If some areas become very thin while others remain thick, start with a more evenly flattened portion and reduce the roller gap in smaller steps. A piece that will not enter comfortably may still be too thick for the initial opening. More force on the handle does not reliably solve these causes and can put unnecessary strain on the equipment or dough. Stop, make the portion smaller or flatter, and begin again with control.
For a successful batch, note the dough recipe, approximate portion size, final roller setting and cutter used. Those details help you repeat the result more than counting handle rotations. If you change machines later, retain the principle but check the new settings against its instructions. Your first attempt can then become a manageable sequence: portion the prepared dough, make it even at a wide setting, roll progressively thinner, check the surface and cut appropriately. Each correction belongs to a specific stage, rather than an indiscriminate addition of more flour or more force.