Read beyond the word semolina
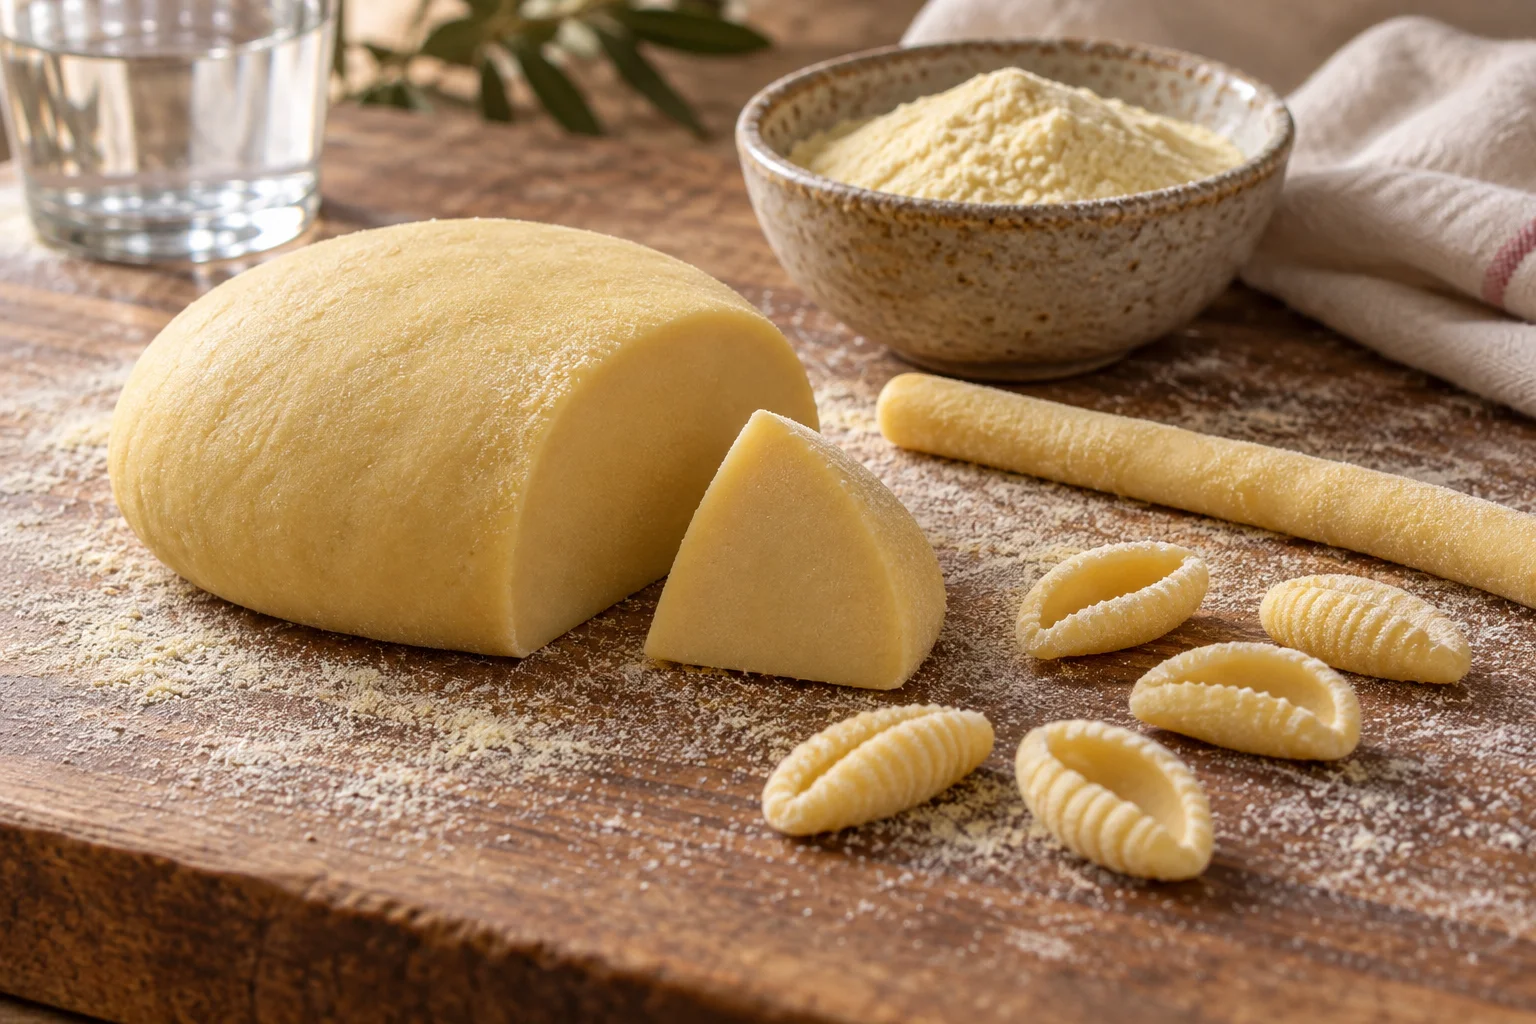
Semolina is made from durum wheat. For hand-kneaded pasta dough, a finely milled product is often the easier starting point. Italian packets frequently call this semola rimacinata. Rimacinata means remilled and indicates a finer grind. Look for a fresh-pasta application on the packaging too. A product sold for dusting a pizza peel may differ from the flour you want to knead into smooth pasta dough. The specific product description and intended use matter more than the large word semolina on the front of the bag.
Durum is wheat and contains gluten. A yellowish colour does not establish that eggs are present, nor does it mean that the pasta is gluten-free. Pure durum wheat and water make an eggless dough, but read the ingredient list on blends. Italian tipo 00 also does not automatically mean durum wheat. A very fine soft-wheat blend can be sold for pasta too. When following a recipe, record the grain, grind and any additional ingredients. That makes it easier to understand whether a difference in consistency comes from your flour or from the amount of water added.
Distinguish a fine grind from coarse grains
Coarser semolina feels distinctly grainy between your fingers. That does not make it unsuitable for all pasta, but it changes how you work with it. A recipe may combine coarse semolina with another flour or specify a different quantity of water. Do not casually replace fine durum flour with it and expect an identical result after the same brief knead. Visible grains in the freshly mixed dough do not automatically mean that a large amount of water is missing either. First distribute the ingredients evenly and allow time for hydration.
For your first batch, a small amount of one clearly labelled product is more useful than a large collection of different blends. Note the product name and how much water you actually use. The protein figure on the packet offers additional information, but it does not fully describe handling. Two products with similar figures may have different grinds and absorb water differently. Avoid relying on a supposedly universal protein threshold. For the method below, the more useful target is a cohesive dough that shapes after resting without breaking into dry, crumbly edges.
Start with 300 grams of finely milled semolina
For a manageable batch, weigh 300 grams fine semola rimacinata and an initial 160 grams water at room temperature. Keep a small additional amount of water separate so that you can make measured adjustments if needed. This example contains no salt in the dough; salt is added to the cooking water later. The two ingredients give a calculated 460 grams of unshaped dough before minor handling losses. Depending on sauce, appetite and the rest of the meal, that makes approximately three portions or two large ones. There is no fixed multiplier that precisely predicts its cooked weight.
The 160 grams water is about 53.3 percent of the flour weight. That percentage refers to the flour, not the total weight of dough. With 300 grams semolina, 50 percent would mean exactly 150 grams water, while 55 percent would mean 165 grams. An additional teaspoon holding roughly five grams can already make a noticeable difference in this small batch. Weigh it if you want a useful record of the change. This formula is a starting point for fine flour and hand-shaped pasta. Other recipes, products or shapes may intentionally use different proportions.
Distribute the water before judging consistency
Put the semolina in a wide bowl and make a well in the centre. Pour in the measured water and gradually bring in the dry flour with a fork or dough scraper. A bowl contains the liquid even if the flour wall gives way. The same method works on a board but requires more control. Scrape damp pieces off the utensils and press the rough crumbs together. There is no need for the dough to look smooth at this early stage, before the ingredients have been properly combined and kneaded.
Judge the water quantity only after thorough mixing. A wet lump beside dry flour initially indicates uneven distribution, not a good reason to pour in more liquid at random. Press and fold until as much as possible joins together. If dry crumbs still refuse to incorporate after that, lightly dampen your hands or add a few grams of water. Work each small correction all the way through before deciding whether another is necessary. This avoids repeatedly adding water, then compensating with more dusting flour when the surface becomes too sticky.
Knead a firm, cohesive dough
Transfer the joined mass to a clean work surface and knead by hand for about eight to ten minutes. Push forward with the heel of your hand, fold back and turn the piece regularly. It should gradually become smoother. It remains much firmer than soft pizza dough and does not need to stretch into a paper-thin membrane. Short hand-shaped pasta needs a resilient mass that responds to pressure and keeps its new form. A springy but initially rough dough is therefore a normal intermediate stage rather than an automatic sign that something has gone wrong.
Work with smaller batches if your hands tire quickly on a large quantity. Adding water simply to make kneading easier also changes the later shaping behaviour. A brief covered pause may be more comfortable than pushing against a stubborn lump for several uninterrupted minutes. If using a machine, follow its limits for firm pasta dough, batch size and speed. Eight to ten minutes of hand-kneading is not an automatic machine setting. This stiff dough can load an appliance differently from a soft bread mixture even when both batches weigh the same overall.
Give the dough its covered rest
Cover the kneaded dough closely and leave it to rest for about 30 minutes. An appropriately sized bowl over it or suitable wrapping prevents a dry skin. Resting lets moisture distribute more evenly through the flour and makes shaping easier. This mixture contains no yeast and does not need fermentation like pizza dough. You are not waiting for it to double in volume. After the pause, assess the smoother surface and how readily it can be worked rather than treating the absence of a rise as a problem.
Cut off a piece and inspect its cross-section. It should be cohesive, without loose islands of dry flour. A small dry patch can develop outside even when the interior has suitable moisture. That primarily calls for better covering, not an immediate large water correction throughout the batch. Divide the dough into several pieces for shaping and keep the unused portions closely covered. Especially while you slowly form your first few noodles, this habit is more effective than repeatedly moistening a large ball that has been left exposed on the work surface.
Use the firmness for simple hand-shaped pasta
For basic cavatelli, roll a small portion into a rope roughly a finger's thickness and cut off similar-sized pieces. Press your fingertips into one piece and drag it a short distance towards you across the work surface. This produces a small hollow that can catch sauce. Aim for a thinned centre rather than a solid ball with a shallow dent. Pieces that are too large or remain thick take longer to cook. Start with a few noodles and examine their thickness before dividing the entire batch into many uneven pieces.
The work surface needs some grip for this motion. Too much loose flour underneath makes a piece slide away instead of stretching under your fingers. Dust sparingly and increase only if sticking is a problem. Once shaped, place the pasta apart on a lightly dusted surface. The pieces should retain their hollows without sticking to one another. A rigid target number from 460 grams dough is not particularly useful while size and shape still vary. Similar wall thicknesses help during cooking more than reaching an exact count of finished pieces.
Rolled sheets need attention to their actual thickness
Fine durum dough can also be rolled into sheets, but it behaves differently from recipes containing plenty of egg or some soft-wheat flour. If your goal is ribbon pasta or filled shapes, begin with a formula intended for that use. The firm dough above is primarily an introduction to hand-shaped pasta. A coarse flour mixture does not become a suitable thin ravioli wrapper simply because the rollers are set very close together. Applying excessive pressure in one pass can create tears without improving the distribution of moisture within the dough.
With a suitable pasta roller, flatten a portion first, start at the widest recommended setting and gradually reduce the thickness according to the instructions. Setting numbers are not consistent across machines. Watch the actual sheet and the requirements of your chosen pasta shape instead. Guide the emerging dough loosely rather than pulling it down hard. If it shrinks back strongly, give it a covered pause. If it sticks, light dusting is more useful than a thick flour coating. A full ribbon-pasta method must also account for cutting, separating the strands and choosing an appropriate cooking time.
Work out why dough is dry, sticky or cracked
If the dough breaks into crumbly pieces while rolling, first check that it has been thoroughly mixed, kneaded and rested under cover. If a freshly cut centre still feels dry, a small water addition may be needed. Dampen the surface of a portion evenly, knead it back together and give it a little time before making another correction. Five grams water added to 300 grams flour increases the calculated hydration by about 1.7 percentage points. That is already a meaningful change in firm pasta dough, rather than a negligible extra splash.
If it smears heavily onto your hands and board, check the amount of liquid actually weighed. Light dusting can address surface sticking but cannot indefinitely correct a mixture that is far too soft. Record extra flour too. If you add 20 grams to the original 300 grams, the same 160 grams water now relates to 320 grams flour and equals 50 percent hydration. That changes the whole dough. Cracks limited to a dried outer layer can appear even when the original mixture was appropriate. Covering and ingredient proportions are separate things to adjust.
Cook fresh or freeze the shaped pieces
Prepare the sauce before adding fresh pasta to boiling salted water. Small fresh hand-shaped pieces often need only a few minutes, with thicker ones taking longer. Around three to five minutes can be an initial guide for cavatelli. Check a cooked piece at its thickest point. It should yield pleasantly without a raw, floury core. Floating alone is not sufficient evidence of doneness. If the pasta will finish briefly in a hot sauce, account for that additional cooking when you lift it out of the water.
A slightly dried surface does not automatically turn freshly shaped pasta into shelf-stable dried food. For a later meal, freezing in portions is a more manageable option. Arrange the uncooked pieces separately on a suitable tray, freeze until firm and then package them. Cook directly from frozen and check doneness again instead of assuming an exact additional minute. Do not taste raw flour or uncooked dough; assess flavour after cooking. Your recorded flour and water quantities, together with a useful shaping thickness, give you a clear starting point for the next batch.