Check how the pizza was stored
Yesterday's pizza can regain a crisp base without turning the cheese dry. The aim is to heat the base and toppings at roughly the same rate. Your best method depends mainly on quantity and thickness. A frying pan with a lid is convenient for one or two thin slices. Several portions fit more easily in an oven. An air fryer suits small quantities when the slices can lie next to each other in its basket.
This guide concerns fully baked pizza that was chilled promptly after the meal. Pizza left on the table overnight does not reliably become safe again through reheating. A normal smell cannot establish safe storage either. If you know during the meal that some slices will remain, set them aside early. Do not wait until the end of a long party. This also applies to vegetarian pizza with cheese, sauce and other moist ingredients.
Cool leftovers promptly in shallow containers and store them covered in a refrigerator at no more than 7 °C, preferably below 5 °C. Use chilled leftovers within two to three days or freeze individual portions in good time. When reheating, every part of the pizza should reach at least 70 °C for two minutes. Pay particular attention to thick crusts and heavily topped areas. A clean food thermometer helps you check. Melted cheese alone tells you little about the temperature inside the food.
Choose according to the portion
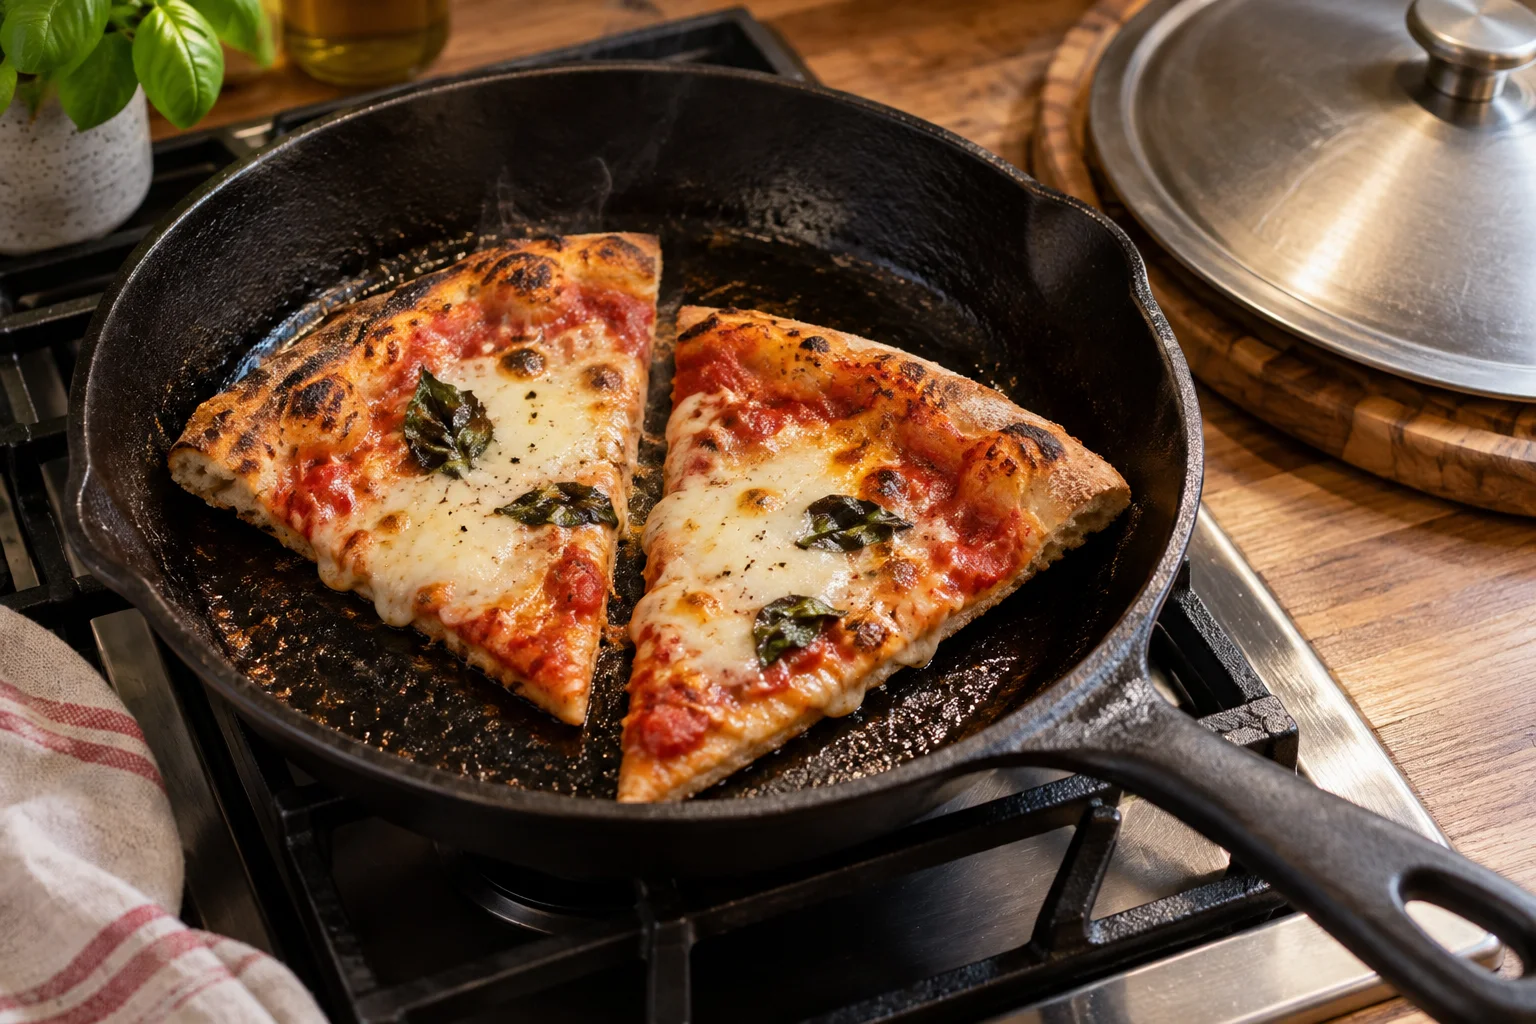
For two thin slices from the previous evening, I would start with a suitable frying pan. It applies heat directly to the base, while a lid keeps heat around the toppings. There is no need to heat a large oven cavity. For a whole pizza or several different slices, a baking tray provides more room. Separate thin and thick pieces so you can remove those that are ready first. Overlapping slices heat unevenly and remain soft where they touch.
An air fryer is another option for individual portions. Its circulating hot air reaches the surface quickly. Thick, cold toppings may still take longer than the crust. A microwave heats quickly but does not produce the crisp base of a hot pan or baking surface. Expect a softer result if you use one. Choose according to the texture you want and the appliance you have. Occasional pizza leftovers do not require the purchase of another kitchen gadget.
Two thin slices in a frying pan
Place two chilled, fully cooked slices side by side in a large enough pan. Their bases should touch its surface. Start with low to medium hob heat and put on a suitable lid. Extra oil is usually unnecessary in an appropriate pan, since the cheese and toppings already contain fat. Inspect the underside after about three minutes. For thin slices, initially allow roughly six to ten minutes. This is a window for observation, not a guarantee of adequate reheating.
If the base darkens quickly, reduce the hob setting. If the topping remains cool, allow more time under the lid at a gentler heat. Towards the end, remove the lid briefly to release steam and dry the base. Check a thick area of topping and maintain the required food temperature for long enough. Do not let the first sizzle tempt you into using excessive heat. A burnt base cannot be restored, whereas a cool topping can continue warming.
Does the pan need extra water?
A lid already traps moisture released by the sauce and toppings. For a thin, lightly topped pizza, that is often enough. If the upper surface stays dry, you can add a few drops of water to an empty part of the pan at moderate heat, then replace the lid. Do not pour water onto the pizza itself. That would soak the base you are trying to crisp. The pan must not contain a pool of hot oil when you add water.
Avoid using a large splash as a shortcut. Too much steam can leave the crust chewy and the base soft. A thick tray-baked slice is often easier to heat evenly in the oven than through repeated adjustments in a pan. If you add water on your first attempt, briefly note whether it was necessary. Next time, compare using the same slice size and hob setting. This gives you a useful method for your kitchen rather than blindly following someone else's minute count.
Reheat several slices in the oven
As a starting point, preheat the oven to 180 °C conventional heat. Place chilled slices with space between them on a suitable baking tray. For a typical thin pizza, make a first check after about eight minutes and initially allow around ten to fifteen minutes. A cold tray, generous toppings or thicker slices can extend the time. Check earlier if the pizza was already deeply browned during its first bake. Food temperature and the condition of the base and cheese determine when it is ready.
A suitable tray preheated with the oven can give the base more initial heat. Use it only when you can transfer the slices onto it and remove them safely. There is no need to heat a heavy pizza steel for an hour just for leftovers. If one is already hot, it can be useful, but watch closely because a previously baked base may darken quickly. Use baking paper only within its temperature rating and never where it could touch heating elements or an open flame.
Check an air fryer early
Arrange one or two slices in a single layer on the intended insert. Leave room for air to circulate around them. A starting setting is 160 to 170 °C on an appropriate reheat programme. Inspect thin slices after around three minutes, then continue in short intervals. An initial planning window is often five to eight minutes, but appliances, quantities and toppings vary considerably. Checking the food's internal temperature remains necessary even when the cheese is already browning quickly.
Follow your appliance's instructions on preheating and permitted liners. Loose baking paper can be lifted by the airflow and carried towards a heating element. Do not line the basket in a way that completely blocks its intended air passages. Very light herbs or thin topping pieces may be better removed before reheating and replaced with fresh ones afterwards. If the centre stays cool, lower the temperature and extend the time instead of continuing to roast the edges.
When a microwave is the only option
Spread the slices on a microwave-safe plate, avoiding overlaps. Cover them with an appropriate vented microwave cover and begin at medium power. Check in short intervals, such as every 30 to 60 seconds, and change the slices' positions. Wattage, quantity and thickness determine how many intervals you need. Follow the appliance guidance on standing times and check several areas because microwaves can heat unevenly. Every part of the food must reach the required temperature.
Expect a soft base. A glass of water beside the plate does not turn a microwave into a stone oven. If you have a frying pan, you can briefly crisp the slices in it after they have been fully heated through. With only one appliance available, the microwave is still a useful way to prepare a quick meal. Allow the pizza to cool briefly to an eating temperature afterwards. Cheese and sauce can be much hotter than the edge of the crust suggests.
Adjust for thick bases and delicate toppings
A thick piece of tray-baked pizza needs time for heat to reach its centre. Cut very large pieces into manageable portions before reheating. Start at a moderate oven temperature and check the middle. If the cheese darkens before the food is hot throughout, loosely protect the surface with a suitable oven-safe cover. Follow material instructions, particularly concerning direct contact between foil and acidic or salty foods. The cover must not touch any heating elements.
Rocket, fresh basil and cold ingredients originally added after baking often lose their intended texture during reheating. Remove them beforehand where practical and add fresh replacements afterwards. Extra sauce will not automatically improve an already wet pizza. Warm the existing toppings first, then decide whether a few fresh ingredients would help. New raw ingredients that need their own cooking should not simply be added at the end to an otherwise finished portion.
Prepare frozen leftovers in portions
Freezing is most convenient in individual portions. Package promptly chilled slices to protect them from drying out and so you can remove them separately later. Label the package with its date and toppings. Plan a manageable supply for the coming weeks. For the methods described here, thaw the required slices covered in the refrigerator. They stay chilled and can then be heated in a similar way to other refrigerated leftovers. An hour on a warm kitchen counter is not a necessary preparation step.
You can also reheat directly from frozen, but allow more time and check the centre carefully. The edge may be hot while frozen areas remain beneath the cheese. An oven generally provides more space and more even conditions for this than a small frying pan. The baking instructions for a shop-bought frozen pizza are not an appropriate timetable for home-frozen, already cooked leftovers. Their dough thickness, previous cooking and toppings differ. Remove only the quantity you intend to eat.
Fix common texture problems
If the base is hard but the toppings remain cold, the heat from below was too strong relative to the rest. Next time, use gentler heat, keep the lid on the pan or allow longer at a moderate oven temperature. If everything is hot but the base is soft, finish with dry heat. Remove the lid or briefly place the pizza on a suitable hot surface. Cheese that has already separated will not become fresh again through extra heating. Stop when the portion has been safely heated throughout and has the texture you want.
Note the slice size, starting temperature, appliance and time of the first check for your usual pizza. Those four details make the next portion easier to plan. You do not need a complete cooking log. A short note such as two thin refrigerated slices, covered pan, low hob setting is enough as a reminder. Check again when the topping changes. Good leftovers begin with prompt chilling, and successful reheating balances thoroughly hot toppings with a crisp base.