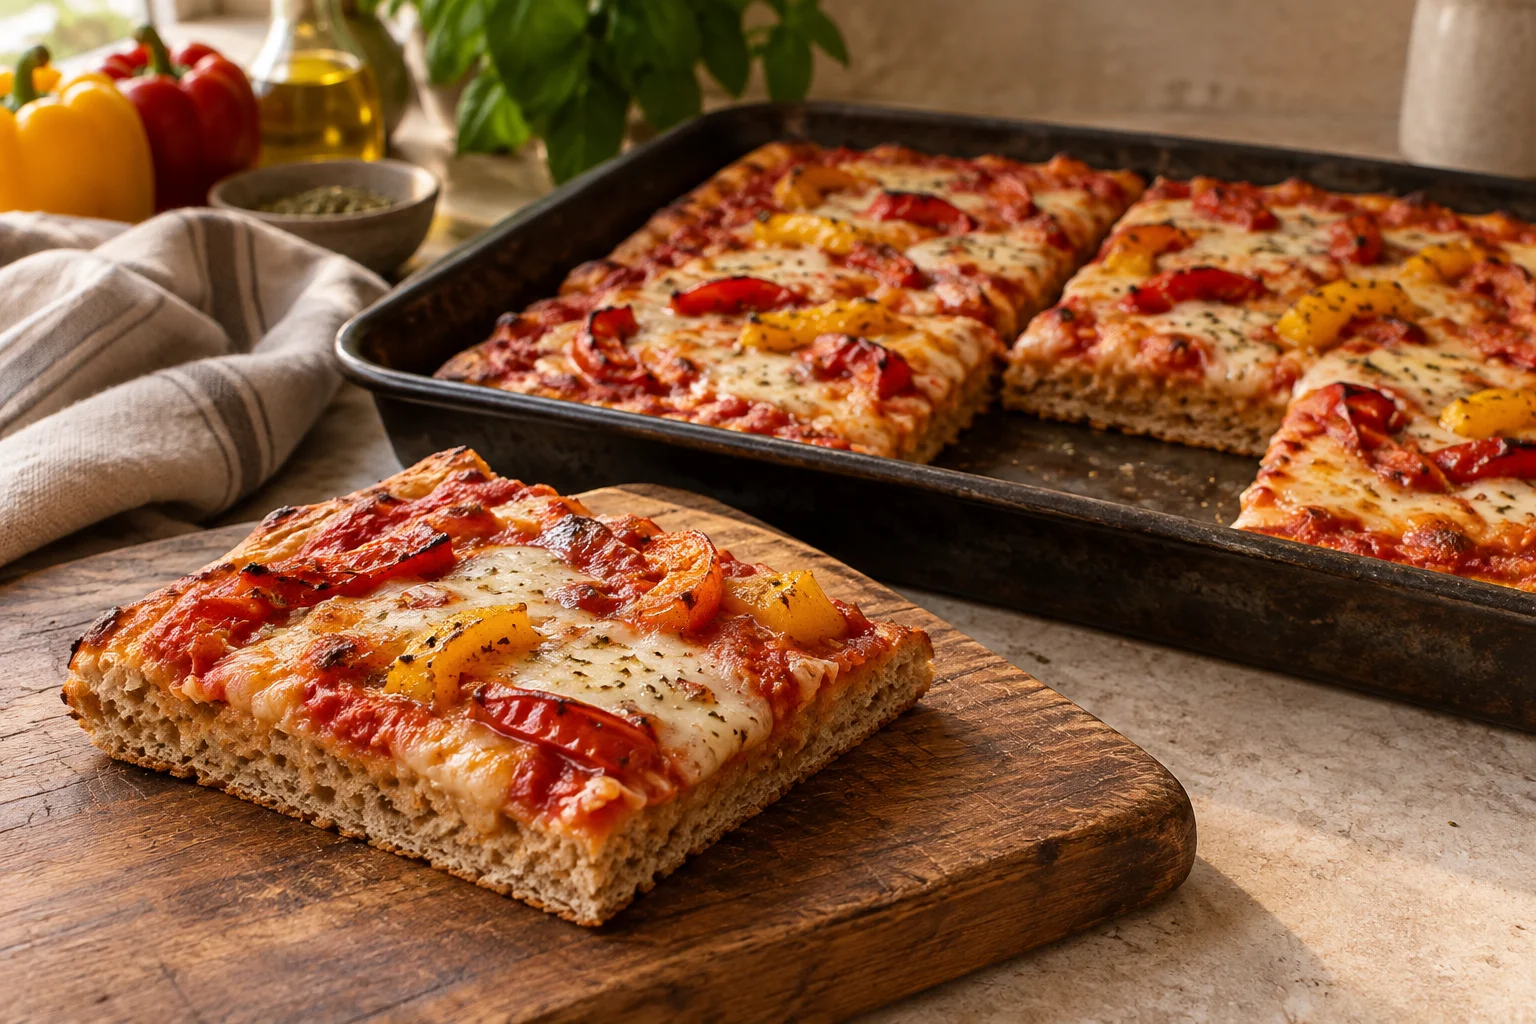
A wholemeal pizza designed for a tray
Wholemeal pizza benefits from dough designed around the flour from the beginning. Simply replacing white flour with the same weight of wholemeal while leaving everything else unchanged can make the base considerably firmer. This method therefore uses a softer dough with a resting stage for hydration. You shape it directly in an oiled tray, avoiding the need to transfer a delicate sheet of dough onto a peel. There is time to correct uneven areas as you spread it. The result is a rustic tray pizza for two to three people, depending on appetite and side dishes.
The recipe uses only wholemeal wheat flour. This means flour containing all the components of the cleaned grain, rather than merely a darker refined wheat flour. A bag labelled German Type 1050 is therefore not an equivalent substitute for a product explicitly labelled wholemeal. Wholemeal spelt and rye behave differently again and are not silently included in this method. Stay with wheat for a first batch you can assess clearly. The finished crumb may be more substantial and compact than a very airy white pizza without needing to be dry or heavy.
Plan the ingredients around the tray size
For a metal tray or suitable pizza pan with an internal baking area of approximately 30 by 40 cm, weigh 400 g wholemeal wheat flour, 300 g water, 10 g salt, 12 g olive oil and 3 g instant dried yeast. Total dough weight is 725 g. You also need about 10 g oil to grease the pan lightly; that oil is separate from the dough quantity. With 300 g water to 400 g flour, hydration is 75 percent. Salt is 2.5 percent of flour weight and the oil inside the dough is 3 percent.
For your first topping, use 200 g fairly thick tomato sauce and 150 g well-drained mozzarella. If you like, add 120 g cooked, cooled and well-drained peppers or courgettes. Weigh the vegetables after preparing them. Leave particularly juicy ingredients out initially so that you can judge the base. If your tray has a substantially different area, calculate the required dough before mixing. The same batch spread across a much smaller surface becomes deeper and needs a different baking duration. Tray area matters more here than whether the pan looks roughly similar at first glance.
Use fresh flour and consider its texture
Smell the flour before making dough. An obviously rancid or unpleasantly musty smell is not part of the stronger flavour you should expect from wholemeal. Do not use such flour for the pizza. Keep opened supplies well sealed, cool and protected from light, following the instructions on the packet. If you rarely bake with wholemeal, a smaller bag may be more practical than a large supply sitting beside a warm oven for months. Label any storage container so that you can identify the flour and when you opened it.
Particle size also affects how the dough feels. Fairly finely milled wholemeal flour is easier to distribute evenly for this introduction than very coarse cracked grain. Small visible bran particles are normal. Do not try to knead them away, because they belong in the flour. A perfectly translucent windowpane like the one you might seek in strong white dough is not a useful sole measure here. Instead, assess whether the dough holds together, stretches gently and looks more even after resting than it did immediately after mixing.
Let the flour hydrate before the main kneading
Combine the flour and instant yeast in a bowl. Add the 300 g water and salt, then mix thoroughly until there are no dry flour pockets. Keep the oil aside for now. Cover the bowl and leave the mixture for about thirty minutes. This pause gives the flour time to absorb water. Only judge its firmness afterwards. Freshly stirred wholemeal dough may feel different from the same mixture after resting. Working in plenty of extra flour immediately to counter stickiness can remove the soft consistency the formula was designed to produce.
Next, incorporate the 12 g olive oil and knead for a few minutes until the dough becomes more cohesive and elastic. A scraper helps gather the soft mixture. It is allowed to remain sticky. If your flour produces unusually firm dough with 300 g water, work in another 5 to 10 g gradually after the hydration rest. Record the amount actually added: 310 g water would give 77.5 percent hydration and 735 g total dough. An adjustment like this supplements the original calculation transparently instead of replacing measured quantities with unrecorded additions.
Judge the first rise by the dough's condition
Leave the dough covered at around 23 to 24°C. For the first batch, allow approximately one and a half to two and a half hours after kneading. It should visibly expand and feel lighter. A volume increase of roughly one half to three quarters is a useful observation range rather than an exact mandatory mark. A straight-sided container makes assessment easier. Height is harder to compare when dough spreads across a broad bowl. Even then, note its starting appearance and when the first clear changes become visible.
After about thirty minutes, you can give the dough one gentle fold with lightly dampened hands. Lift one side only as far as it stretches without tearing, then bring it towards the centre. Repeat around the bowl. The movement is intended to add support, not to accumulate the largest possible number of folds. One round is enough if the dough already holds together. Fermentation takes longer in a cool kitchen and may progress sooner in a warm one. Do not insist on a fixed doubling point if the dough is already becoming very soft and unstable.
Shape on the tray and allow a second rest
Lightly grease the pan, including its corners, with the separate 10 g oil. Transfer the dough carefully and turn it over once if needed to coat its surface lightly. Use your fingertips to spread it only as far as it moves willingly. If it contracts, cover it and wait about fifteen minutes. Then ease it further towards the corners. Two gentle passes are more useful than forceful pulling that thins the middle while leaving thick ridges around the edges. Aim for an even layer before the final resting stage.
Once spread out, leave the dough covered for approximately another sixty to ninety minutes at a similar temperature. It should become softer and slightly puffy. Arrange the cover so that it does not stick tightly to the surface. This second stage provides both relaxation and further fermentation. Topping and baking immediately after the first stretching can leave a denser base. Use the interval to preheat the oven and prepare the topping. Any vegetables should already be cooked and cooled before they go onto the pizza, rather than releasing their cooking liquid into the dough.
Parbake to give the base a head start
Preheat the domestic oven to approximately 240°C with conventional top and bottom heat. Use a tray approved for that temperature. Initially bake the risen dough without sauce or cheese for roughly eight to ten minutes in the lower to middle part of the oven. Its surface should set and begin to colour lightly. You are not yet trying to bake the whole base dark. If one exceptionally large bubble develops, carefully open it with a fork. Small bubbles can remain and give the base a naturally uneven texture.
Remove the tray with suitable oven gloves and promptly add the tomato sauce, mozzarella and optional prepared vegetables. Bake for another approximately eight to twelve minutes, until the cheese melts and the base cooks through. The initial total baking range is therefore sixteen to twenty-two minutes. Lift one corner with a suitable turner to inspect the underside; a dark rim alone is insufficient evidence. If the cheese browns strongly too soon, the next pizza may need less top heat or a lower shelf position instead of simply spending longer in the oven.
Let moisture escape after baking
Release the cooked pizza from its tray as soon as you can do so without tearing it, then place it briefly on a rack. Steam can escape from the underside there. Leaving it in the hot tray for a long time traps moisture underneath and softens the base. Move it onto a board for cutting. When assessing doneness, cut a piece from the middle first. There should be no sticky raw dough layer beneath the sauce. A somewhat softer crumb with a stronger wheat flavour, however, is not in itself a fault.
For leftovers, cool the pizza promptly, then package and refrigerate it. Do not leave it on the worktop overnight. Reheating on an already hot baking surface in the oven is better suited to restoring a drier base than leaving pieces in a closed container full of steam. The time required depends on their thickness and starting temperature. Reheat only the portion you want to eat. If you wish to add fresh rocket or basil, put it on after reheating rather than baking the delicate leaves again.
Change the quantity and wholemeal proportion deliberately
For a 25 by 35 cm tray, divide its area of 875 cm² by the original 1200 cm². The factor is approximately 0.73. For similar dough thickness, you would therefore need around 292 g flour, 219 g water, 7.3 g salt, 8.8 g oil inside the dough and 2.2 g instant yeast. Scale the greasing oil and topping down similarly. Do not multiply the baking time by 0.73, however. With comparable thickness, watch the same signs of doneness and adjust the duration to your actual tray and oven.
If you prefer a milder base, you can develop a subsequent batch replacing some wholemeal flour with white wheat flour. That produces a pizza containing wholemeal rather than one made entirely from it. Begin such a blend with less water and reassess its consistency after the hydration rest instead of automatically retaining 75 percent. Record the flour blend, water quantity, room temperature and pan size. Those details let you correct an overly dry or soft base without changing every ingredient and step at each bake.