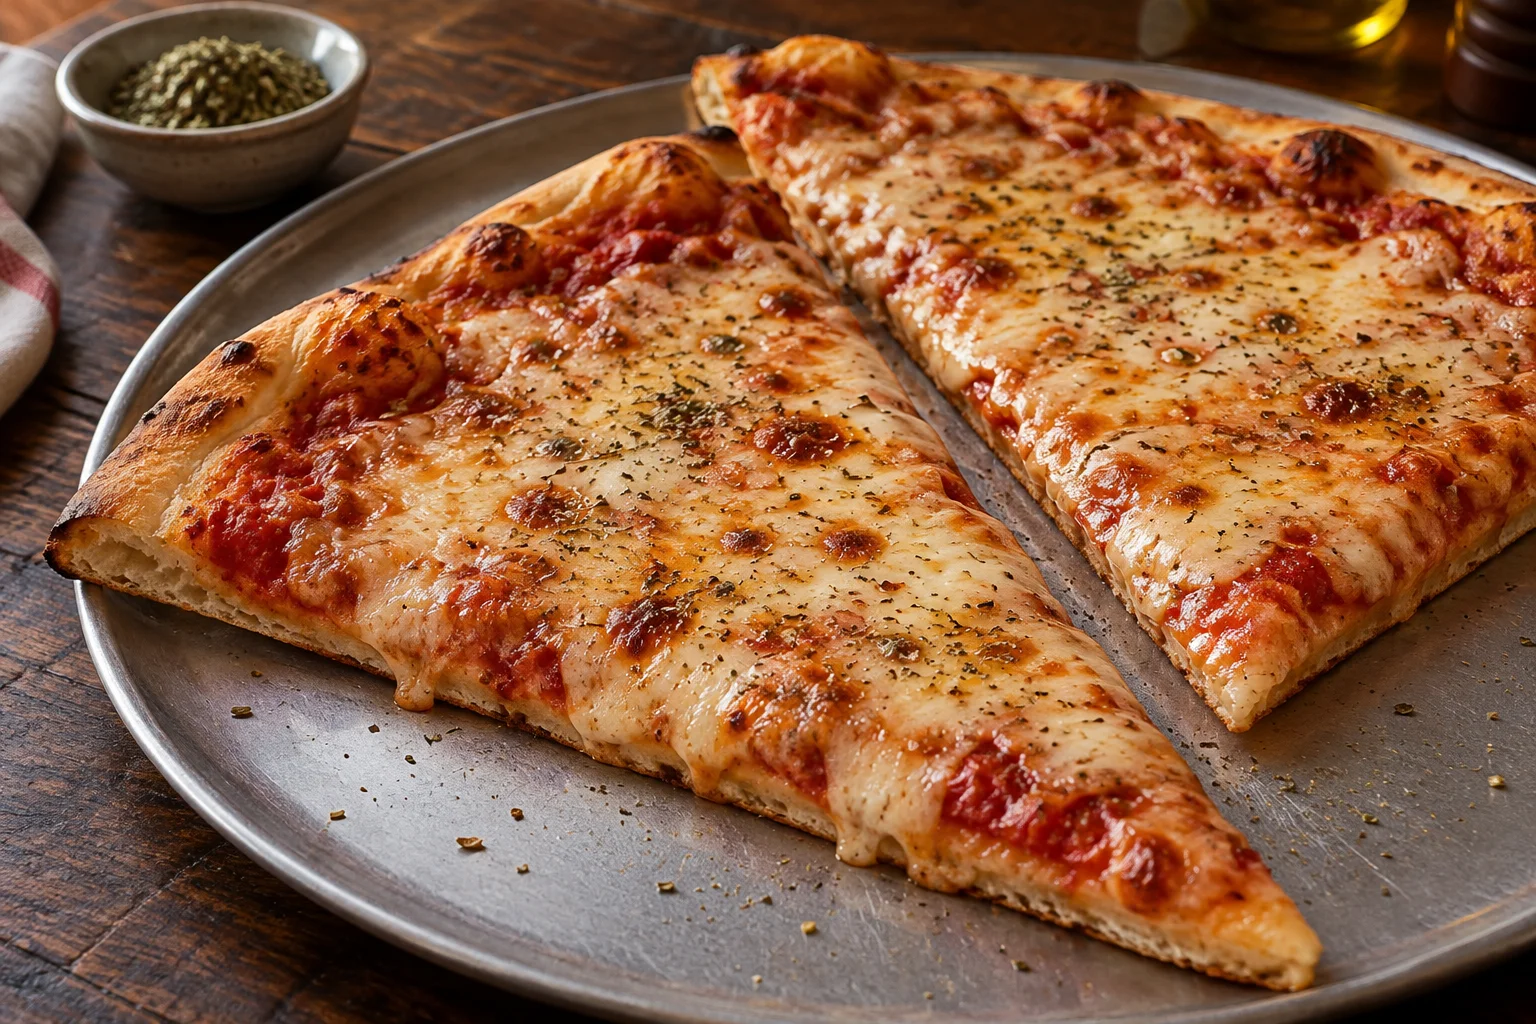
Large slices with a flexible base
New York pizza should cut into a large slice that you can fold slightly along its length. The base needs enough strength to support the sauce and cheese, while retaining some chew. The edge can be crisp without the centre snapping like a dry cracker. At home, a diameter of about 32 to 34 cm is often more practical than the enormous pizzas found in American slice shops. The whole pizza needs to fit your peel, baking surface and cutting board. Check those dimensions before you decide how large to stretch the dough.
This method uses two dough balls, an overnight rise and a domestic oven. A little oil makes the dough more supple, while a small amount of sugar encourages browning at the temperatures used here. The mixture is intended for the longer bake in a home oven. If you later move to a very hot pizza oven, adjust the dough and heat together. A base that colours well at 250°C can become too dark quickly beneath a strong flame. The instructions below therefore stay with a conventional domestic oven throughout the baking process.
Choose the size before the dough weight
Measure the usable width of your baking surface and peel first. A 32 cm pizza on a stone exactly 32 cm wide leaves no room for error when launching. Starting a little smaller makes the first attempt easier. For two pizzas roughly 32 to 34 cm across, mix 400 g suitable wheat flour, 248 g water, 10 g salt, 8 g olive oil, 4 g sugar and 1 g instant yeast. These quantities total 671 g of dough, giving two portions of approximately 335 g each, before small handling losses.
The mixture contains 62 percent water, 2.5 percent salt, 2 percent oil and 1 percent sugar, all calculated against the flour weight. Choose a flour whose manufacturer recommends it for elastic pizza dough and an overnight rise. A strong wheat bread flour can also work. The label Tipo 00 alone tells you little about water absorption or how long a dough remains stable. Avoid changing flour, water quantity and fermentation time all at once on the first batch. Keeping those choices consistent makes it easier to identify which later adjustment has helped.
Develop an elastic dough
Combine the flour, instant yeast and sugar. Dissolve the salt in the water, then add the liquid to the flour mixture. Stir or knead until you can no longer see dry patches. Cover the rough dough and leave it for ten minutes. Work in the oil and continue kneading. By hand, push the dough forwards, fold it back and turn it. It should become more even and gradually easier to stretch. For a first batch, a coherent, supple structure matters more than achieving a perfect, exceptionally thin windowpane of dough.
If using a mixer, follow its limits for dough quantity and kneading speed. This small recipe must also meet the machine's minimum batch size, otherwise the hook may struggle to reach it. Check the dough temperature if the bowl becomes warm. A break can be more useful than continued rapid kneading. If the dough sticks, scrape it together and allow a short rest first. Adding a large amount of extra flour lowers the hydration without a clear record and can produce a dense, resistant base. Slightly damp hands and a dough scraper make handling easier.
Prepare the dough the evening before
After kneading, let the dough rest, covered, for approximately 45 to 60 minutes. Divide it into two equal portions. Pull each portion's outer edges underneath and close the seam to form a smooth ball. Place it seam-side down in a lightly oiled, covered food container. Leave enough space around and above it for expansion. Refrigerate the dough overnight, at about 4 to 5°C for this starting schedule. A fridge thermometer helps you assess the actual temperature rather than relying only on the position of the fridge's control dial.
If you mix on Friday evening, plan to bake on Saturday evening. Initially allow about two to three hours out of the fridge before baking. Then judge readiness from the dough's temperature and ability to stretch. A soft, relaxed portion opens more easily than a cold ball with a tight surface. A hot kitchen may get it there sooner. Return the second portion to the fridge briefly if necessary while you work on the first. Both balls do not have to remain warm without interruption until the final pizza is ready to bake.
Make a sauce that stays on the slice
Start with about 160 to 180 g of fairly thick tomato sauce for the two pizzas. Crushed peeled tomatoes or a passata that is not too watery make suitable bases. Season with salt and a little dried oregano. If the tomatoes are very watery, drain off excess liquid or briefly reduce the sauce in a pan. Cool a cooked sauce before spreading it on the dough. Hot sauce softens the dough surface and makes it sticky while you are still trying to keep the base moving freely on the peel.
Initially spread about 80 to 90 g of sauce per pizza in a thin, even layer. Moving the spoon should not push a high wave of tomato ahead of it. Leave a narrow clear rim that you can hold later. Taste the sauce with a small piece of your chosen cheese before adding a lot of salt. Mozzarella, hard cheese and any salami will contribute salt too. A simple cheese topping is useful on the first pizza because it lets you judge the crust, sauce and melting behaviour without many other ingredients obscuring the result.
Choose cheese with little free moisture
Firm mozzarella with a lower moisture content works well for an even layer of melted cheese. Begin with about 100 to 125 g per pizza. Grate it coarsely or cut it into small pieces, then distribute it almost to the edge. Fresh mozzarella stored in brine produces a different surface and can release considerably more liquid. If you want to use it, drain it thoroughly and start with a smaller amount. A generous layer of wet cheese can quickly turn a thin crust into a soft support for the toppings.
A little finely grated hard cheese adds flavour, for example about 10 g per pizza. It does not replace the whole mozzarella layer and may brown faster on the surface. Scatter it sparingly beneath or between the mozzarella. Spicy salami is an optional addition; start with a few thin slices. Too much fat can collect in a separate layer. The first pizza shows you how much fat your particular cheese and toppings release. Use that information when topping the second base instead of loading both pizzas heavily before either has entered the oven.
Open the base and move it safely
Gently release one dough ball from its container and place it on a lightly floured work surface. Press down the centre with your fingertips and work outwards. Leave a narrow rim without making it particularly thick. Rotate the dough and distribute the pressure across the whole inner area. If one spot becomes thin early, continue working on the thicker sections. Strong contraction calls for a covered rest of fifteen minutes. Forcing the dough wider can increase its diameter, but often leaves an uneven base or tears in the centre.
Finish stretching the disc over the backs of your hands or with small movements on the work surface. For roughly 335 g of dough, 32 to 34 cm is a starting range rather than a requirement. An intact, slightly smaller disc is easier to handle than an overstretched base. Transfer it to a lightly dusted peel and check that it slides before adding toppings. Release any small sticky patches individually. Only then add sauce and cheese. Avoid topping a pizza that will have to wait on the peel until the oven becomes available.
Bake the underside thoroughly in a home oven
Heat a suitable baking surface together with the oven, following the accessory manufacturer's instructions. A useful starting point for this dough is 250°C with conventional top and bottom heat. A substantial stone or steel takes time to store energy, so do not end the preheat simply because the oven indicator goes out. Around 45 to 60 minutes is a reasonable guide for many products, but follow the specific instructions for yours. Start on a middle or lower shelf if that position gives your oven a suitable balance of heat above and below.
Launch the pizza and check it after about six minutes. The total bake may take around seven to twelve minutes, depending on the surface, dough thickness and toppings. Briefly lift the firm edge to inspect the bottom. It should brown before the cheese becomes dry and dark. If the top colours too quickly, a lower position may help on the next pizza. If only the upper rim stays pale, consider a suitable higher position for the finish. Do not improvise by moving heavy, hot baking surfaces between shelves; move the pizza with a suitable peel instead.
Cut, fold and identify problems
Place the finished pizza on a rack briefly so steam cannot collect underneath. Then cut it into large slices. A sufficiently baked base supports the toppings and can fold a little lengthways. If it snaps immediately, it may have been stretched too thin or baked too long. If the tip hangs down wet and limp, check the sauce quantity, cheese moisture and heat from below instead. Heavy toppings affect the same behaviour. Judge a simple cheese pizza first, then assess more heavily topped versions against that result rather than expecting every slice to behave identically.
If the first pizza is good but the second has a pale bottom, the baking surface may not have recovered enough heat. Allow time between pizzas and keep the oven door open as briefly as possible. Dark marks concentrated in a few spots can instead come from burnt flour. Dust the peel more sparingly and keep it clean. Record a specific observation, such as a soft centre after nine minutes or dry cheese before the base browns. That gives you something concrete to adjust instead of always turning the heat up or extending the bake.
Organise an evening around two large pizzas
Prepare the sauce, cheese, peel, board and plates while the oven heats. Set out small amounts of toppings and keep the rest chilled. Share the first pizza at the table while the second one bakes. This rhythm avoids holding a finished pizza warm until everything is ready. If you are cooking alone, decide where you will put the hot pizza before launching it. At that moment, a clear space beside the oven is more useful than a worktop covered with additional prepared bases that cannot yet be baked.
For more guests, calculate the dough from the number and size of pizzas you plan to make. Two pizzas do not represent a fixed number of servings; appetites and other dishes matter. Calculate the toppings separately so the dough plan comes with a usable shopping list. On the next batch, you can keep the size, hydration and fermentation schedule while increasing the quantity. To explore a different texture, compare this method with thin Roman pizza or an airy Neapolitan-style dough. Each calls for different treatment of the rim and a baking method suited to its intended crust.