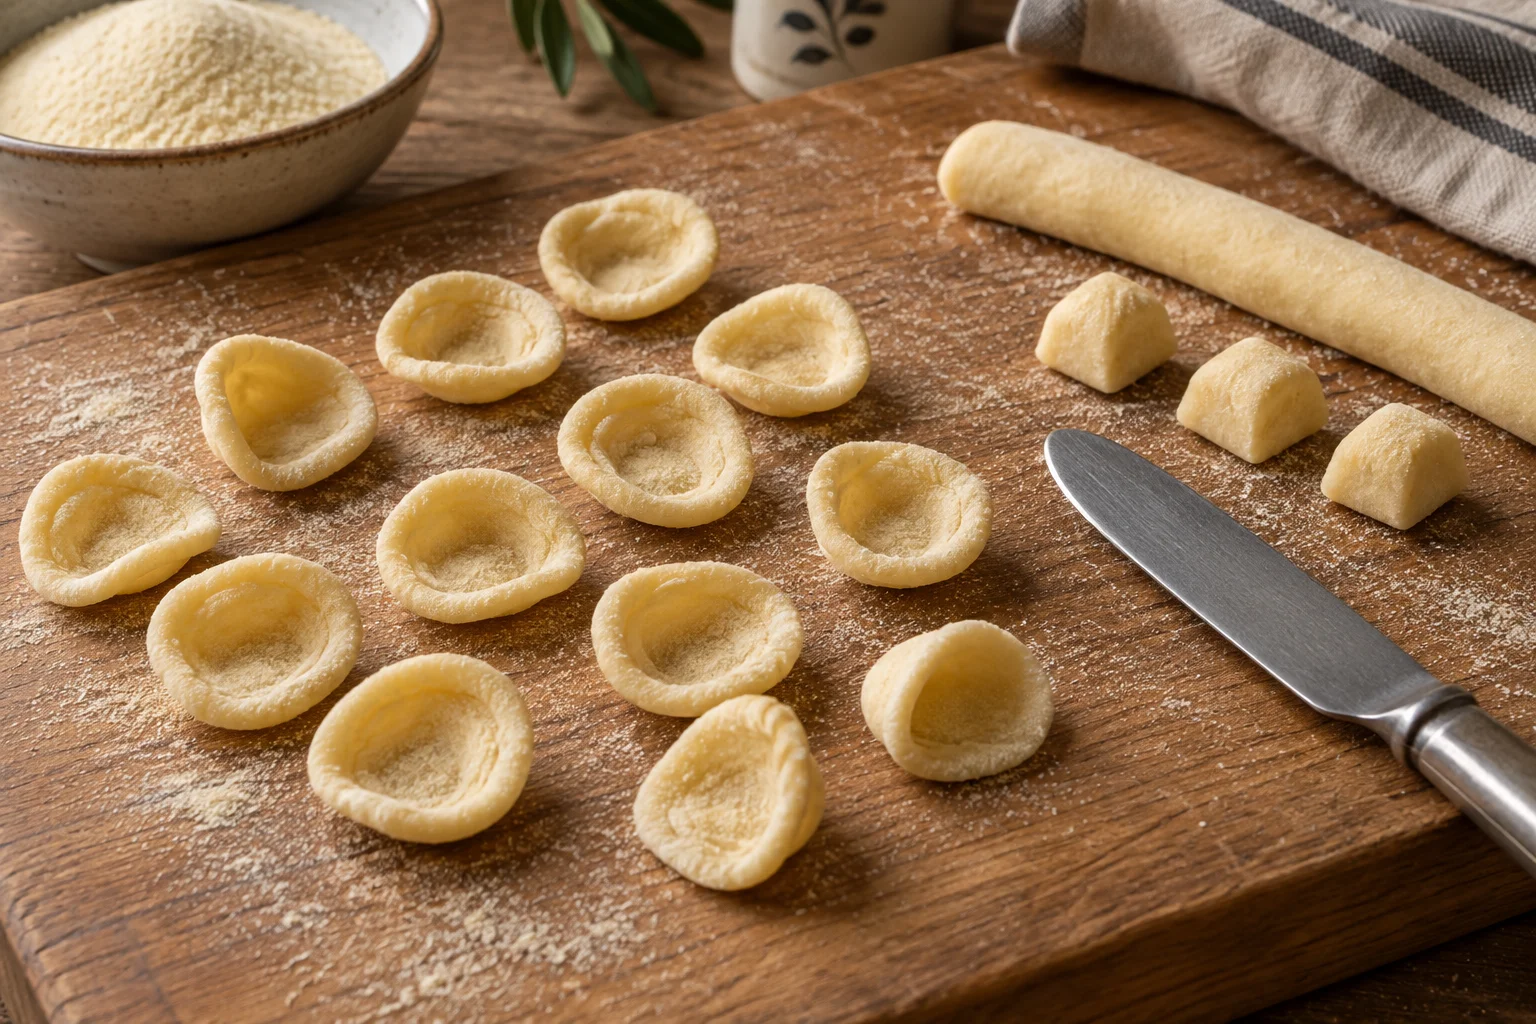
What a well-shaped orecchietta looks like
Orecchiette are small hand-shaped pasta from Puglia in southern Italy. Their name refers to their resemblance to little ears. For cooking, the important feature is their cross-section: the centre should be thinner than the slightly thicker rim. The cup can hold sauce and small pieces of vegetables. You do not need a perfectly circular outline to achieve this. A slightly oval piece with a thin centre is usually more useful than an exact circle with a thick lump of dough at its base. Dragging the dough with a knife creates the characteristic irregular surface texture.
Take time to compare the thickness of your first five pieces. Put them beside each other and look at the rims from the side as well. Large differences in size make it harder to cook the batch evenly. A hole through the centre is not a feature you are aiming for: orecchiette are not rings. A long closed curl is not the finished shape either. That curl develops during the dragging movement and is then turned inside out. Practising those two movements separately makes it easier to identify where a problem starts.
A manageable dough to start with
For a first batch, use 300 g finely milled durum wheat semolina and 150 g water at room temperature. The flour is often labelled semola rimacinata. Coarse semolina needs different handling and is not a straightforward substitute. These two ingredients produce 450 g dough before handling losses. That makes roughly three main-course portions with sauce, or four smaller servings. This dough contains neither eggs nor oil; you will salt the cooking water later. It is vegan provided that your chosen sauce is also vegan. Durum wheat contains gluten.
Weigh the water first, then use a fork to mix it into the semolina in a bowl. Bring the crumbs together with your hand. At first, the dough feels much firmer than bread dough. That is intentional for this shape: very soft dough smears during dragging and struggles to hold a cup. Do not immediately add more water just because a few loose crumbs remain. Press them into the mass first. If the dough still falls apart dry after you have brought it together thoroughly, continue working with lightly dampened hands and watch how it changes.
Kneading and resting
Knead on a clean surface for about eight to ten minutes. Push the dough forward with the heel of your hand, fold it back and turn it occasionally. You want a firm, cohesive mass without pockets of dry flour. It does not have to shine or stretch like a soft pizza dough. If the surface remains slightly rough after a short knead, the subsequent rest often helps. A large extra splash of water, on the other hand, can only be balanced by adding more flour later, changing the whole batch. Note small adjustments if you plan to use the same flour again.
Rest the ball for approximately 30 minutes, tightly covered so that the surface does not develop a crust. This gives the flour time to absorb moisture and makes shaping easier. No yeast is needed, and you are not waiting for an increase in volume. Allow about 90 minutes for mixing, resting, shaping and cooking on your first attempt, or longer if you work slowly. Use the rest to prepare your board, knife, tray and sauce. That way, the finished pasta will not need to sit around while you search for ingredients at the end.
Keeping the rope and pieces consistent
Divide the dough into four working pieces and keep three covered. With both hands, roll the first piece into a rope approximately one centimetre thick. Gradually move your hands from the middle towards the ends. If the rope slides away, there may be too much loose flour on the board. Clean that part of the surface and try again. A little friction between dough and board helps it lengthen. Work with a shorter rope if the ends become thin before the middle reaches the thickness you need.
Cut only six to eight pieces at first, each about one centimetre long. These measurements provide a starting point for manageable little shapes. What matters is keeping the pieces reasonably similar to one another. A piece twice as long contains much more dough, which would then need to be drawn thinner. Shape the first small group before cutting the rest of the rope. This prevents a large pile of cut dough from drying while you are still finding a comfortable knife angle. Keep the remaining rope covered too, exposing only the next section when you need it.
Drawing the knife across the board
Use a blunt table knife with a smooth edge and rounded tip. A sharp kitchen knife is unnecessary for this movement. Put one dough piece in front of you. Position the blade at the edge furthest from you, tilt it slightly, and press down while pulling towards yourself. This is a short, steady movement along the board. The centre becomes thinner and the piece begins to curl around the blade. You are not cutting through the dough or sawing back and forth over it several times.
The pressure you need depends on the firmness of the dough, the knife and the work surface. Start with moderate pressure and inspect the result. If a thick lump remains, use a slightly flatter angle and lengthen the next pull a little. If you simply push the unchanged lump ahead of the knife, the surface may be too heavily floured. If it sticks and smears, a very light dusting of semolina on the working area may be enough. Avoid adding a thick new layer for every piece: it hides how the dough itself is behaving.
Turning the curl into a cup
Gently release the drawn piece from the knife and put the knife down. The pasta will often look like a short elongated curl at this stage. Press your thumb tip against its inside and turn it outwards over the tip. The textured surface created by dragging now sits on the outside of the little dome, leaving a hollow on the other side. A gentle movement is enough. You do not need to stretch the dough over your whole thumb or push your finger through it. Use a smaller fingertip for particularly small pieces.
Place the finished orecchietta on a food-safe tray lightly dusted with semolina. Keep pieces separate instead of stacking them inside one another. Their cups may face upwards or slightly sideways; standing perfectly upright is not a measure of quality. If a piece folds back on itself, turn the next one a little more decisively over your fingertip without stretching the rim out of shape. Avoid repeatedly reversing a centre that is already very thin. A misshapen piece that is still supple can be gathered once and shaped again. Keep these corrections brief so that the dough does not dry out.
Fixing holes, thick rims and sticky pieces
If the centre tears, you may have pulled too hard with the knife or started with a very small piece. Reduce the pressure before changing the whole dough. If dry cracks appear while you are still rolling the rope, check the covering and moisture instead. A small piece of fresh dough can be brought together again with lightly damp hands. Do not simply press a hard skin into a finished noodle. More consistent ropes help prevent overly thick rims. During shaping, avoid pressing on only a tiny central point while leaving the rest of the piece unchanged.
Sticky pieces require a different adjustment. First remove damp dough smears from the board and dust the working area sparingly. If the entire dough is soft and smearing, work a little semolina into the unshaped portion and give it another short covered rest. Add small amounts so that you do not swing between too wet and too dry. Check the tray as well: a damp surface or overlapping pieces can make properly shaped pasta stick together. Vigorous flouring after the finished orecchiette have stuck will not neatly separate them again.
Cooking fresh orecchiette evenly
Bring enough water to the boil in a pan to let the pasta move freely, then salt it to suit the sauce. Add the fresh pieces in manageable batches and stir gently at the beginning. For this small shape, start checking after approximately four minutes. That is not a fixed finishing time: thickness, size and surface drying all affect cooking. Cut through the thickest part of a rim. There should be no hard, floury core left. A thin centre may already be tender while the rim still needs more time.
Floating alone does not tell you whether the pasta is cooked. Inspect the cross-section and taste only a cooked piece that has cooled slightly. Do not taste raw flour dough. If the sizes differ substantially, cook the largest pieces separately. Save some cooking water before draining to adjust your sauce. If you intend to finish the orecchiette briefly in a hot sauce, account for that additional cooking when checking them. A long extra simmer in the frying pan can soften the thin centres too much, even when the rims were right beforehand.
Getting sauce into the little hollows
For the first batch, a prepared tomato sauce is convenient: you can concentrate on shaping and adjust the sauce consistency at the end. Transfer the cooked orecchiette to a wide pan of hot sauce and turn them gently. Add cooking water a tablespoon at a time if needed, until the sauce coats the pasta. It should reach the hollows without leaving a large watery puddle on the plate. Small, tender vegetable pieces distribute themselves among these shapes more easily than very large, firm chunks.
Cooked leafy greens with garlic and olive oil are another suitable pairing. Cime di rapa is a familiar example, although versions with anchovies are not vegetarian. Decide from the actual ingredients rather than from the vegetable named in the title. A cold pesto does not call for prolonged cooking in the frying pan. Mix it with the hot pasta away from strong heat, loosening it with a little cooking water when necessary. Choose a simple sauce for a new dough batch so that you can clearly judge the pasta's thickness and how evenly it has cooked.
Freezing a supply and planning your next batch
If you are not cooking the orecchiette immediately, freezing them separately is a practical option. Space them out on a freezer-safe tray and freeze until firm. Only then transfer them to a closed freezer bag or suitable container. Label the package with the contents and date. You can subsequently remove the amount you need without breaking apart a block of dough. Put the frozen pieces straight into boiling water and check their thickest points again. The cooking time you observed for the fresh batch cannot be transferred unchanged to the frozen supply.
Brief surface drying during shaping does not turn fresh pasta into shelf-stable dried pasta. A firm outer surface is not enough to establish that it can spend weeks in a kitchen cupboard. Clear away flour and raw dough scraps after working, then clean your hands and work surfaces before handling ready-to-eat food. A few notes are enough for the next batch: the semolina you used, the actual water added, rope thickness and observed cooking time. These let you change one thing deliberately. A consistent rope and controlled short knife movement are more useful than a whole new collection of tools.