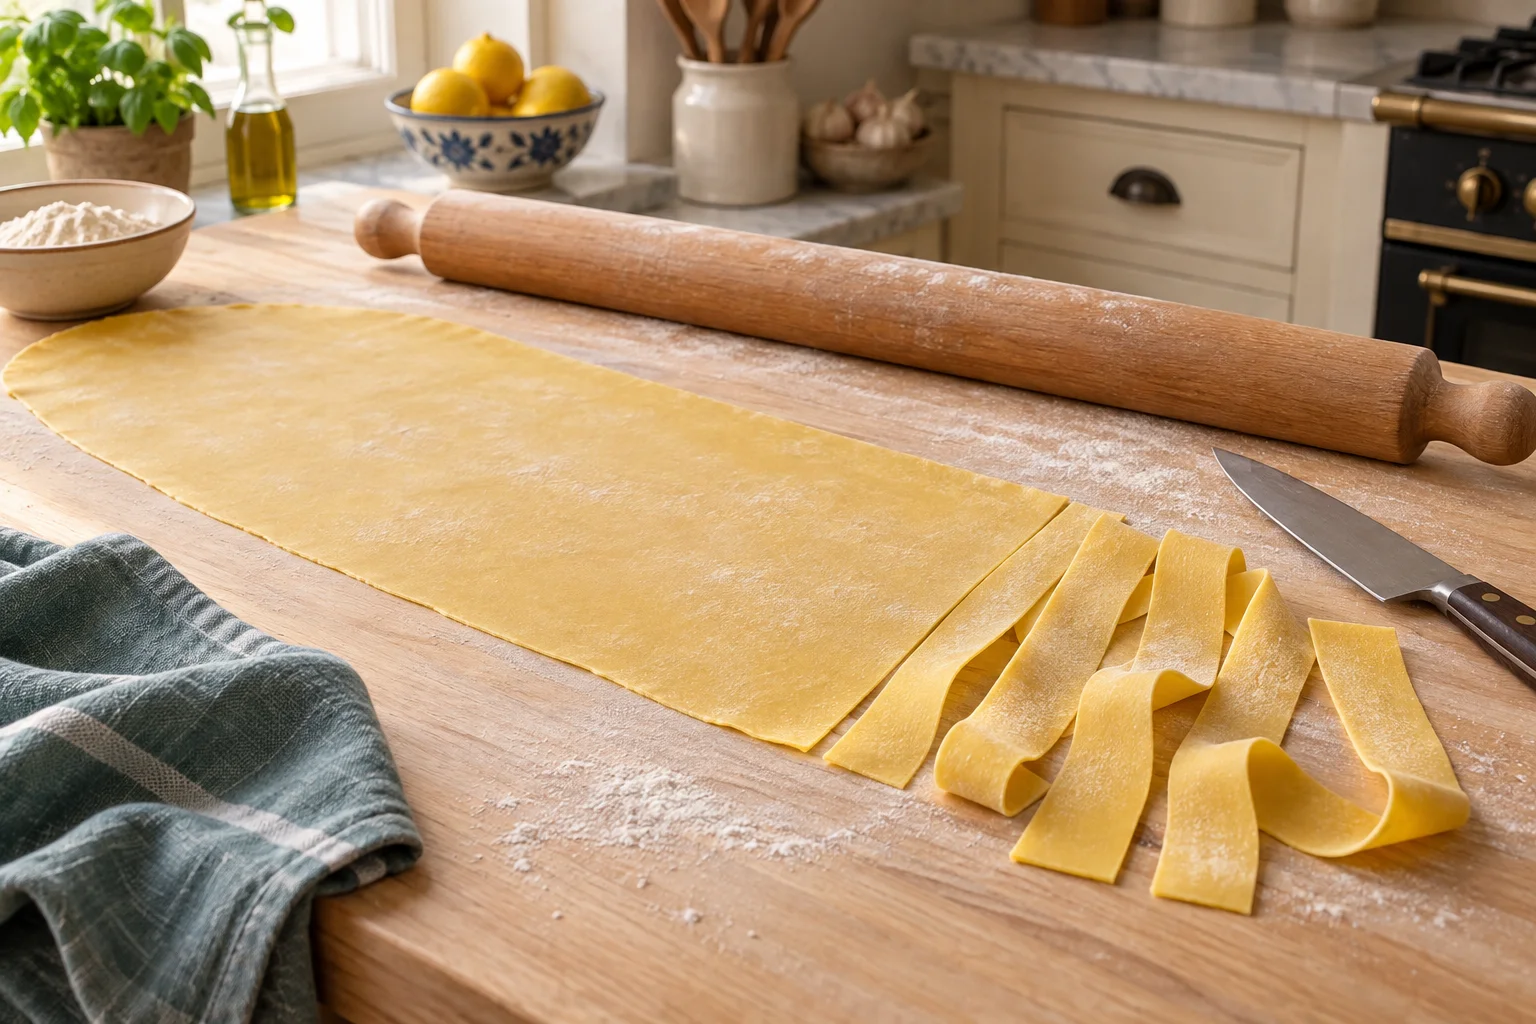
Match your workspace to the pasta shape
Start with broad ribbons. Their thickness is easy to assess, they need no cutter attachment and there is no filling to seal inside. An ordinary rolling pin works as long as the pieces of dough fit its usable width. Have a scale, bowl, fork, dough scraper and sharp knife ready too. For cutting, use a suitable surface that protects both your knife and the worktop. A large, clean wooden board provides space for rolling and cutting. Secure it against slipping if necessary. The work surface should be clean and dry: a damp board turns dusting flour into a sticky coating.
Plan where the cut pasta will go before rolling your first sheet. Place a lightly floured tray beside the board so the ribbons can lie loosely. One generous clear space is more useful than several small bowls that would force you to compress the noodles. Keep the knife outside the rolling area and leave the space behind the board clear. A growing sheet can easily reach over that edge. On a small worktop, roll several small pieces in succession. Making a good meal does not require one enormous sheet of pasta.
A manageable dough for two people
Weigh 200 g fine wheat flour suitable for pasta and 110 g beaten whole egg without the shells. This makes 310 g dough before dusting, roughly two main-course portions with sauce. You also need a little working flour and salt for the cooking water later. This dough contains no added oil or salt. Crack the eggs into a separate bowl, beat them and then weigh the amount you need. Two eggs do not reliably provide 110 g. Refrigerate any small remainder promptly and use it soon in a dish that will be cooked completely.
Here, egg mass equals 55 percent of the flour weight. That describes the ingredient ratio, not the dough's water content: whole egg is not entirely water. A different flour may feel firmer or softer at the same ratio. Start with the weighed ingredients nonetheless, and assess the dough only after mixing thoroughly. For a first attempt, a small measured adjustment is more useful than adding another egg by eye. If you want eggless pasta, use a flour-and-water formula designed for that purpose. Simply omitting the egg from this dough would not produce a workable alternative.
Mix, knead and rest under cover
Put the flour in the bowl and gradually work in the beaten egg with a fork. Once larger crumbs form, press them together with your hands. Incorporate the dry material at the bottom of the bowl too. The dough may look uneven at first. Only after thorough mixing can you tell whether it really needs more liquid. If it remains crumbly and will not bind even under pressure, work in a few more grams of egg or water. Weigh this adjustment instead of adding an uncontrolled splash. Dough that already holds together but still feels rough often needs further working first.
Knead by hand on the work surface for roughly eight to ten minutes, until the dough becomes smoother and more supple. Push it forward with the heel of your hand, fold it back and turn it slightly. The time is a guide; look for firm, cohesive dough without loose patches of flour. Cover it closely and let it rest for about 30 minutes. This pause makes rolling easier. It is not a yeast fermentation, and the dough should not double in volume. Refrigerate it during longer interruptions. Do not taste raw dough, even when you only want to assess its texture.
Three small pieces instead of one large sheet
Divide the rested dough into three roughly equal pieces. With a total weight of 310 g, each working piece weighs about 103 g. That number is a rolling aid, not a serving size. Keep two pieces covered while working on the third. First press it into a flat disc by hand. Dust the underside and rolling pin lightly. A thick layer of flour may initially dry the surface, but repeatedly incorporating it changes the dough. Add small amounts precisely where sticking occurs instead.
Before the first long rolling stroke, check that the disc lifts from the board. Gently raise it along a broad edge. If it already sticks, release it with the scraper and lightly dust that spot. Avoid pulling on one corner, which would stretch only that area thinner. A cold piece straight from the refrigerator may initially feel much firmer. Let it become slightly more pliable while covered rather than immediately kneading in extra water. If the rolling pin catches in one place, inspect both contact surfaces: sometimes the damp residue is on the pin, not the board.
Roll from the centre and turn regularly
Set the rolling pin around the middle and roll towards the outside with even pressure. Ease off just before the edge to avoid creating a very thin, ragged strip. Turn the sheet roughly a quarter turn and repeat. This lets you work in different directions without filling the board with an increasingly long ellipse. Lift the sheet regularly. You will notice sticking underneath early enough to add a trace of flour. Do not continue rolling for minutes while the dough stretches across an underside that remains fixed to the board.
As the sheet grows, spread the pressure over longer strokes. Guide the pin evenly with both hands instead of pressing harder on one side. If one edge moves outwards faster, turn that area away from the strongest pressure. A roughly rectangular or oval sheet is sufficient for ribbon pasta. It need not be a perfect circle. Thin projecting edges can become short noodles later. Avoid stretching the sheet apart with your hands as if it were a pizza base: this can create thin patches between thicker sections. Let the rolling pin gradually reduce the thickness across the whole surface.
Assess thickness across the entire sheet
For the broad ribbons described here, aim for a sheet around 1 mm thick. This is a working target, not an exact requirement or a rule for every pasta shape. Pay particular attention to the centre and the areas leading towards the edges. An almost translucent corner tells you little about a thick strip still running through the middle. Lift the sheet gently and compare how evenly it lets light through. This is a visual guide rather than a measurement: colour and flour affect the impression. Give a visibly thicker area a few targeted strokes while keeping pressure off the thinner sections.
If the sheet contracts noticeably after every pass, cover it for about five minutes and try again. Brief relaxation often helps more than simply pressing harder. Keep the other pieces covered during the pause. If the rolled sheet no longer fits your board, divide it in half and finish the pieces separately. There is no need to leave it hanging over the table edge. You can cut around a small tear at the perimeter. Several holes through the middle, however, suggest that the thickness has become uneven or that the dough has been pulled too hard.
Let the surface dry briefly, then cut broad ribbons
Before folding, the finished sheet should no longer feel very sticky, but it must still bend easily. Leave it exposed briefly if necessary, checking its surface repeatedly. A few minutes may be enough, depending on the room and thickness; dry air can make it brittle sooner. Lightly dust both sides. Fold the sheet loosely into broad layers without pressing it into a tight roll. Cut across those layers in strips roughly 1.5 to 2 cm wide. These will be broad ribbons; the width is not presented as a binding regional definition of pappardelle.
Unfold the cut layers straight away and gently separate the ribbons. If they stick together, the surface was too damp, the dusting too light or the folds too compressed. Cut a small trial section from the next sheet before proceeding. You can also cut strips while the sheet lies flat if folding feels difficult. This takes more space but removes the contact between stacked layers. Put the finished pasta loosely on the prepared tray. Avoid pressing it into dense nests. Irregular edge pieces can remain shorter and cook alongside noodles of similar thickness.
Prepare the sauce and cooking water before the final cuts
Have the sauce ready before the noodles enter the water. Thin fresh ribbons cook quickly, leaving little time to chop an onion or reduce a tomato sauce. Bring enough water to the boil in a suitable pot and salt it. Add the noodles loosely and move them gently at the start so the ribbons separate. With a larger quantity, use manageable batches. A crowded pot makes separation harder and cools considerably when the pasta is added. You can combine each cooked batch with part of the prepared sauce.
For thin fresh ribbons, begin checking after about two minutes. They may need longer depending on thickness. Remove a piece and inspect a thicker section in particular: it should be cooked, without a raw, floury centre. Floating alone is not a sufficient sign of doneness. If the pasta will finish in a hot sauce, allow for that final cooking stage. With cold pesto, it must already be fully cooked when drained. Save some cooking water to loosen a sauce that is too thick. Serve as soon as the sauce and noodles are combined.
Correct hand-rolling problems at their source
If the sheet sticks to the board, release it completely before dusting the affected area. Continuing to roll over a stuck patch often creates a thin edge and thick centre. If only the rolling pin sticks, clean and dry its surface, then use a little dusting flour. When the whole dough becomes progressively drier, consider how much extra flour has already been worked in. The board does not need a permanent white coating. Uncovered spare pieces also develop dry patches that can later split. Keeping them covered prevents this more easily than kneading an established skin smooth again.
If the cut ribbons vary significantly in thickness, separate the heavier pieces and cook them on their own. For this meal, that is more useful than leaving the thin noodles in the water until the thickest finally cook. Check the centre earlier when rolling the next piece. If ribbons break during unfolding, the sheet became too dry or had very thin patches. Shorten the exposed pause and, if needed, cut the next sheet flat. Different problems therefore need different corrections: more flour can address sticking, but it will not fix strong springback or a brittle surface.
Plan the workflow when making more portions
Allow around an hour and a half for mixing, resting, rolling, cutting and cooking on your first attempt. Much depends on your workspace and experience. While the dough rests, prepare the sauce, tray and cooking equipment. Then take each piece all the way to cut noodles instead of rolling every sheet first. This prevents the first sheet from drying unnoticed while you are still working on the third. Doubling the dough mainly increases the handwork. More dough needs extra tray space and a plan that avoids leaving finished portions waiting in a warm room for a long time.
Cook the cut pasta promptly or freeze it in portions. Initially arrange it loosely, with space between pieces, on a suitable tray in the freezer. Once frozen firm, package it in a closed container and add the date. The shaped noodles can later go straight from frozen into cooking water; reassess doneness at their thickest point. Brief surface drying before cutting does not turn egg pasta into a shelf-stable pantry food. During a longer interruption, cover and refrigerate both dough and finished noodles. This keeps the hand-rolling session manageable when dinner starts later than you expected.